-

Customer Experience -

Employee Experience -

Brand Experience -

Core XM -

Design XM
Qualtrics Inbound Connector
About the Qualtrics Inbound Connector
You can use the Qualtrics inbound connector to load surveys from your Qualtrics account.
Uploading Data From a Qualtrics Account Into XM Discover
Before You Begin
Before you configure a job using the Qualtrics inbound connector, make sure you have the following information related to your Qualtrics account:
- Your Qualtrics instance address.
- Your Qualtrics API token.
- The name of the survey from which to upload data.
Qtip: For more information, please see Qualtrics API Documentation.
Setting up the Connection
- Sign in to Connectors.
- Click the New Job button in the upper-right corner of the Jobs page.

- On the Connectors page, go to the SELECT A SOURCE section.

- Click the Qualtrics button.

Creating a Qualtrics Inbound Connector Job
After you’ve set up the connection, follow these steps to create load surveys from your Qualtrics account into XM Discover.
- Step 1: Provide Job Name
- Step 2: Specify Project and Description
- Step 3: Provide Qualtrics Credentials
- Step 4: Qualtrics Data Type
- Step 5: Map Desired Fields Into XM Discover
- Step 6: Data Substitution and Redaction (Optional)
- Step 7: Specify Filter (Optional) and Record Limit
- Step 8: Notification and Configuration (Optional)
- Step 9: Set Up Additional Options for Job
- Step 10: Confirm All Job Settings

Step 1: Provide Job Name
Enter a recognizable job name in the Job Name box in the upper-left of the page.

Step 2: Specify Project and Description
- On the Specify Project and Description page, select the project into which data is to be loaded from the projects dropdown menu.
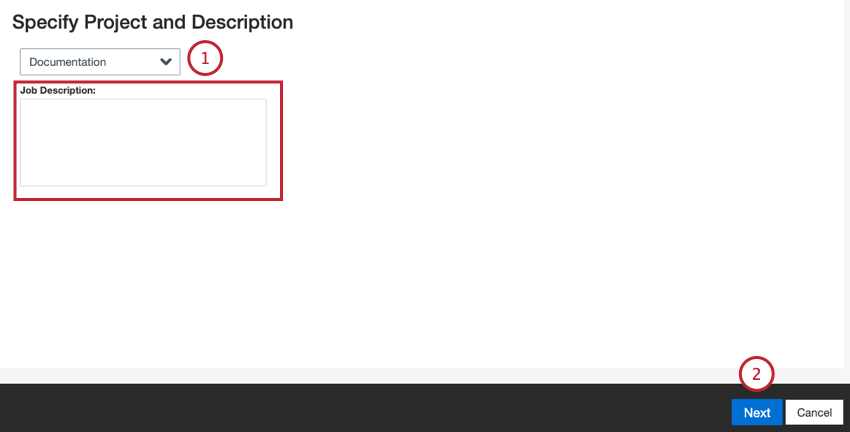 Qtip: You have the option to enter a note about the job in the Job Description box. The job description that you enter in the Job Description box is only accessible in the Connectors list and is not uploaded as part of the data for a job.
 - Click Next.
Step 3: Provide Qualtrics Credentials
- On the Provide Qualtrics Credentials page, you can select an existing set of credentials from the dropdown menu.
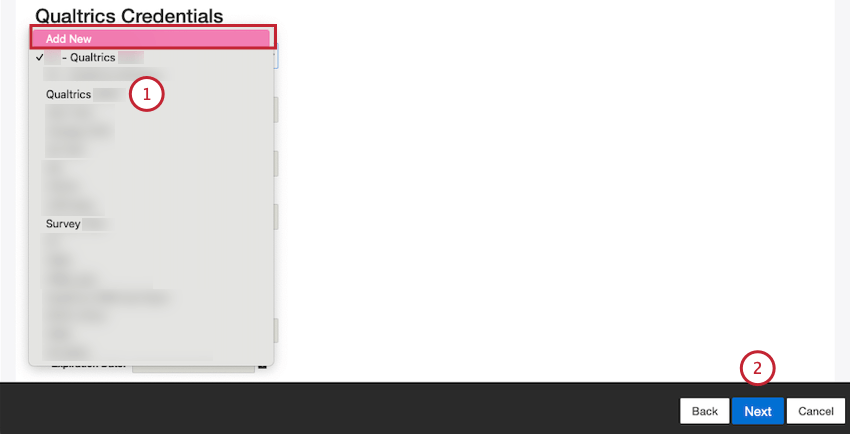 Qtip: You can add a new set of Qualtrics credentials. For information on new Qualtrics credentials, see the Adding New Qualtrics Credentials section.
 - Click Next.
Step 4: Qualtrics Data Type
- On the Qualtrics Data Type page, select 1 of the following options to specify the type of data to upload into XM Discover:
- Survey: Upload data from a specific Qualtrics See the Survey subsection below for more information.
- Online Reputation Management (ORM): Upload reviews and location data from a Qualtrics Reputation Management project. See the Online Reputation Management (ORM) subsection below for more information.
- Tickets: Ingest ticket data from Qualtrics Engage. See the Tickets subsection below for more information.

- Click Next.
Survey
- If you select Survey, you will be taken to the Select Survey for Configuration page, where you can select 1 of the available Qualtrics surveys to upload data from.
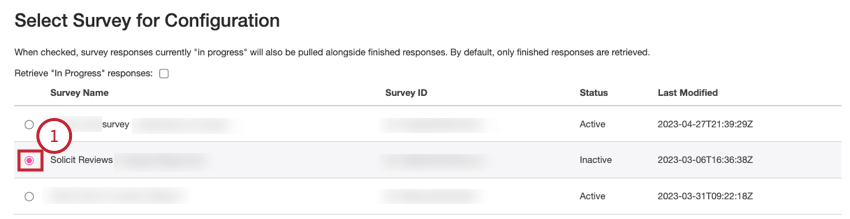 Qtip: If you don’t see the survey you are looking for, make sure it is shared with the account that generated the API key from within the Qualtrics environment.
 - If filters are available for the selected survey, select 1 of the Qualtrics filters from the menu (optional). For more information, see Filtering Responses.

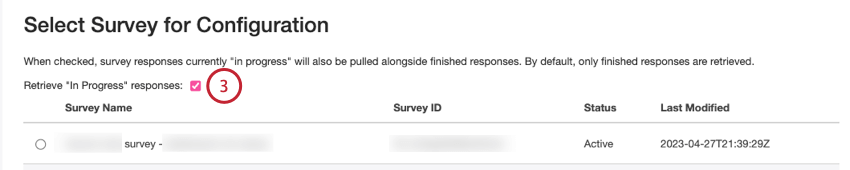
- Select the Retrieve “In Progress” responses checkbox if you want to include unfinished responses in the upload. Don’t select this checkbox if you only want to pull completed responses.
 Qtip: You can update query configuration after the job is created.
Online Reputation Management (ORM)
If you select Online Reputation Management (ORM), you will be taken to the Specify ORM Dataset Id page where you can enter the idpSourceId for the imported data project into the IDP Source Id box.

Tickets
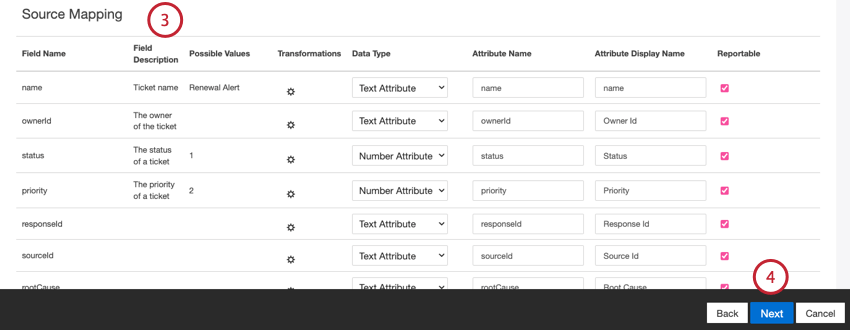
If you select Tickets, you will be taken to the Map Desired Fields into XM Discover page where you can connect source data fields to data fields in your XM Discover project.
Step 5: Map Desired Fields Into XM Discover
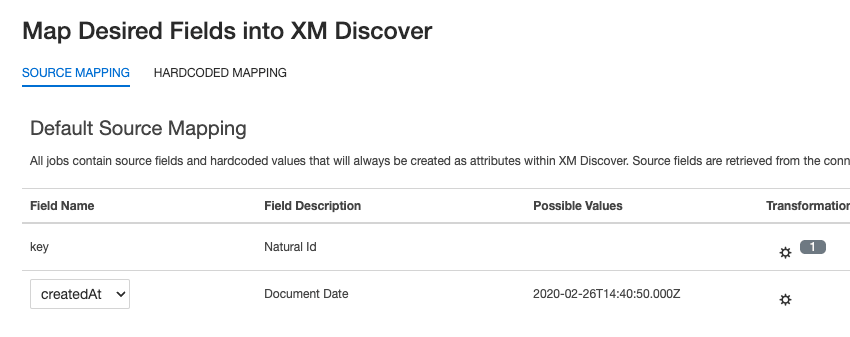
- On the Map Desired Fields Into XM Discover page, select the SOURCE MAPPING tab to connect source data fields to data fields in your XM Discover project.

- In the Default Source Mapping section, configure the default data fields that all documents in XM Discover share. For information on default source mapping, see the Default Source Mapping section.
- In the Source Mapping section, configure any additional data fields from the file.
 Qtip: For more information about data mapping, please see Configuring Data Mapping.
 - Click Next.
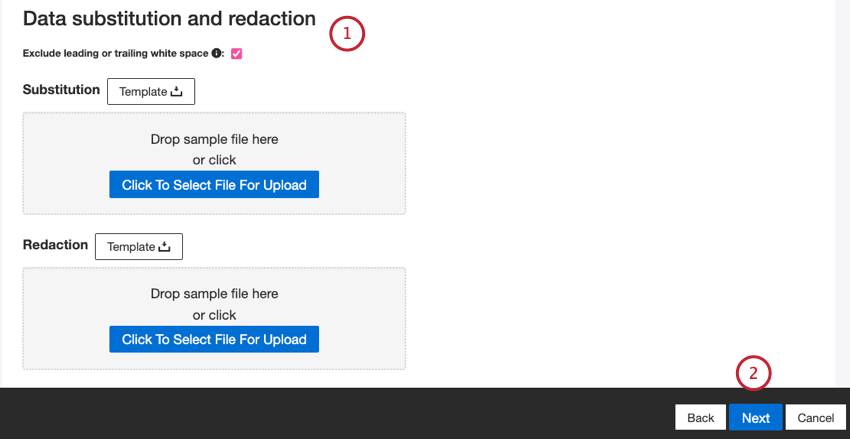
Step 6: Data Substitution and Redaction (Optional)
- On the Data Substitution and Redaction page, you can provide substitution and redaction rules to hide sensitive data or automatically replace certain words and phrases in customer feedback and interactions.
 Qtip:For more information about data substitution and redaction, please see Data Substitution and Redaction.
 - Click Next.
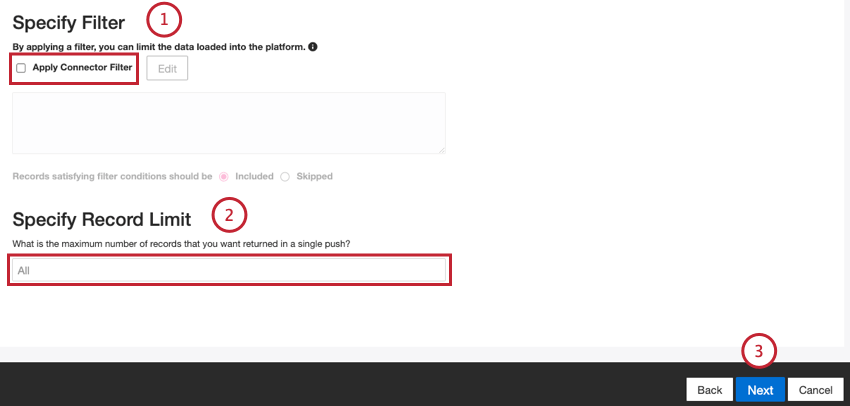
Step 7: Specify Filter (Optional) and Record Limit
- On the Specify Filter page, you can define a filter condition for a job to load only records that satisfy it (optional).
 Qtip: For more information about applying a filter, please see Connector Filter.
 - You can specify a record limit in the Specify Record Limit box. Alternatively, you can leave the record limit as the default All if you want all records to be returned in a single push.
Qtip: Record limit is a limit per run of the job. If you set it to 1,000, the job will run at whatever schedule you set, and will stop after pulling 1,000 records. If you set it to daily, that means it will run once per day and you will get up to 1,000 records for each day.Qtip: For conversational data, the limit is applied based on conversations rather than rows.
- Click Next.
Step 8: Notification Configuration (Optional)
- On the Notification Configuration page, you can select the notifications that the watchers of a job should receive if any of the events listed below occurs.
- Notify when zero records loaded in the project.
- Notify when consecutive missing values found.
- Notify when job execution fails.
- Notify when job execution partially succeeds.
- Notify when job ends with a timeout.
- Notify Support when this job fails.

- Click Next.
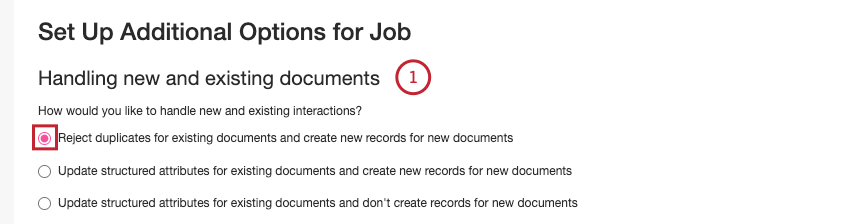
Step 9: Set Up Additional Options for Job
- On the Set Up Additional Options for Job page, in the Handling new and existing documents section, choose how the system should handle duplicate documents by selecting 1 of the following checkboxes in the Handling new and existing documents section:
- Reject duplicates for existing documents and create new records for new documents
- Update structured attributes for existing documents and create new records for new documents
- Update structured attributes for existing documents and don’t create records for new documents
 Attention: Each document must have a unique Natural ID so that the system can handle duplicate documents that have identical Natural IDs.
- On the Set Up Additional Options for Job page, in the Schedule Historical/Incremental Job section, choose 1 of the following options:
- Schedule Incremental Runs to set up a schedule for incremental data pulls.
Qtip: For more information about scheduling incremental runs, please see Job Scheduling.
- Set Up One-Time Pull to perform a one-time data pull.

- Click Next.

Step 10: Confirm All Job Settings
- On the Confirm All Job Settings page, you can view a summary of all the settings for a job and edit the settings, if necessary, before running the data upload.

- To run the data upload, click the Finish button when you are ready to run the data upload. A confirmation message will display confirming that the job was successfully submitted.
When you click Finish, the following happens: One-time pulls are run immediately. Unless you enabled the “Create job but do not pull data” option, scheduled pulls are run immediately, then set to run according to the schedule you defined.
For more information about monitoring jobs, please see Jobs Page Overview.
Adding New Qualtrics Credentials
- To add a new set of credentials, select Add New from the credentials menu.

- Enter the name of the new set of credentials in the CONNECTION NAME box.

- Provide your Qualtrics datacenter ID in the QUALTRICS DATACENTER ID box.
Qtip: For information on finding your datacenter, please read the Locating your Datacenter ID section on the Finding Qualtrics IDs page.
- Provide the API token for your Qualtrics account in the QUALTRICS API TOKEN box.
Qtip: To learn how to find a Qualtrics API token, please see API Token Authentication.
- You can set your credentials to expire after a certain time period (optional). To define an expiration date for this set of credentials and set a reminder for all job watchers, select the Send Expiration Notifications checkbox. This enables the Days prior expiration box.

- Enter a value into the Days prior expiration box to set how many days before the expiration the notifications should start. Possible values range from 1 to 100 days.
Qtip: This reminder triggers every time the job runs once the expiration date is less than the number of days set in the Days prior expiration box.
- Select the Expiration Date from the calendar date picker. The expiration date will then be added to the Expiration Date box.
Default Source Mapping
These are the default data fields options for the Qualtrics inbound connector:
- natural_id: Natural ID serves as a unique identifier of a document and allows the correct processing of duplicate documents. For Natural ID, XM Discover uses source IDs prefixed by the connector’s name via a custom transformation: Natural ID = Connector-name;Source-ID

- document_date: Document Date is the primary date field associated with a document. This date is used in XM Discover reports, trends, alerts, and so on. For Document Date, choose 1 of the following options:
- endDate (default): The date and time when the respondent submitted their survey. If the entry is a partial response, this date will indicate the last time the respondent interacted with the survey.

- startDate: The date and time when the respondent first clicked the survey link.
- recordedDate: This is a record of when a survey response was started, submitted or updated in Qualtrics.
Qtip: If source data contains other date fields, you can set 1 of them as Document Date by selecting it in the Field Name column.

- job_name: Job Name helps you to identify data based on the name of the job used to upload it. You can modify this attribute’s value during the setup via the Job Name field that is displayed at the top of each page during the setup.
- loadDate: Load Date indicates when a document was uploaded into XM Discover. This field is set automatically.
- feedback_provider: Feedback Provider helps you to identify data obtained from a specific provider. For Qualtrics documents, this attribute’s value is set to Qualtrics.
- feedback_type: Feedback Type helps you to identify data based on its type. This is useful for reporting when your project contains different types of data (for example, surveys and social media feedback). For Qualtrics documents, this attribute’s value is set to Survey.
- source: Source helps you to identify data obtained from a specific source. This can be anything that describes the origin of data, such as the name of a survey or a mobile marketing campaign. By default, this attribute’s value is set to Qualtrics, but you can provide your own value in the Hardcoded Value column.
