-

Customer Experience -

Employee Experience -

Brand Experience -

Core XM -

Design XM
Audience Management Program
About the Audience Management Program
No matter the experience you’re trying to improve, it’s important to know your audience. The Audience Management Program is a pre-built solution designed to help you create and manage your own panel of respondents.
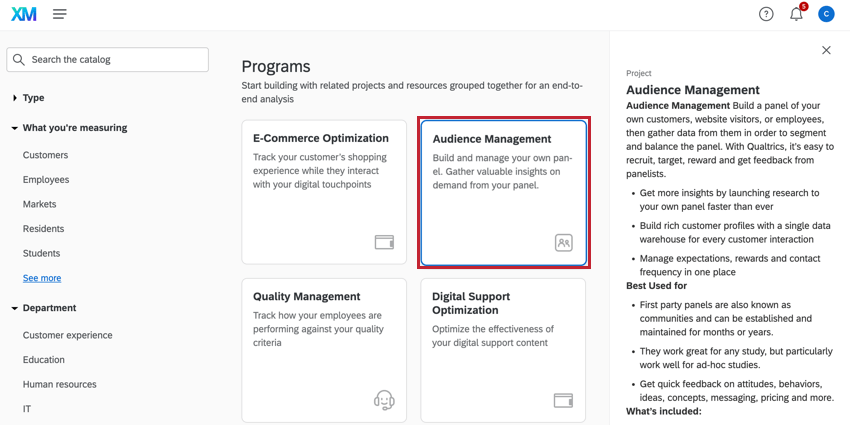
This program comes with 6 pre-configured parts:
- A survey to sign up respondents to your panel.
- A thank you email for joining the panel.
- A survey to keep respondent information updated.
- A dashboard with key insights about your audience.
- An XM Directory list (you can choose to create a new list or update an existing one).
- A panelist app for panelists to view studies available to them.
Creating an Audience Management Program
See Creating Guided Solutions for a step-by-step guide on how to create this program from the Catalog. This section contains tips to keep in mind when creating your program.
- You can save your contacts to a new or existing list in your XM Directory. If saving contacts to a new list, the list will be created in your default directory.
- You can include customizable demographic questions based on geographic region. These responses to these questions are automatically mapped back to demographic fields in XM Directory. To learn more about these types of questions, see certified questions.
- To add custom questions to your program, see Adding Customized Questions.
- You can send an update survey to panelists on a schedule of every 3, 6, 9, or 12 months. You can set a custom schedule by following the instructions in the to Choosing the Update Survey Schedule
Qtip: A Default Directory is required in order to implement an Audience Management program, or else you will receive an Error Message. If you are experiencing issues while implementing an Audience Management program, check your Directories page via the following steps:
- Navigate into Directories via the Main Menu
- Check if your Directory has a Default Directory page
If your Directory does not have a Default Directory page, or your account does not have directories at all, contact your Brand Administrator to see if you can access these features.
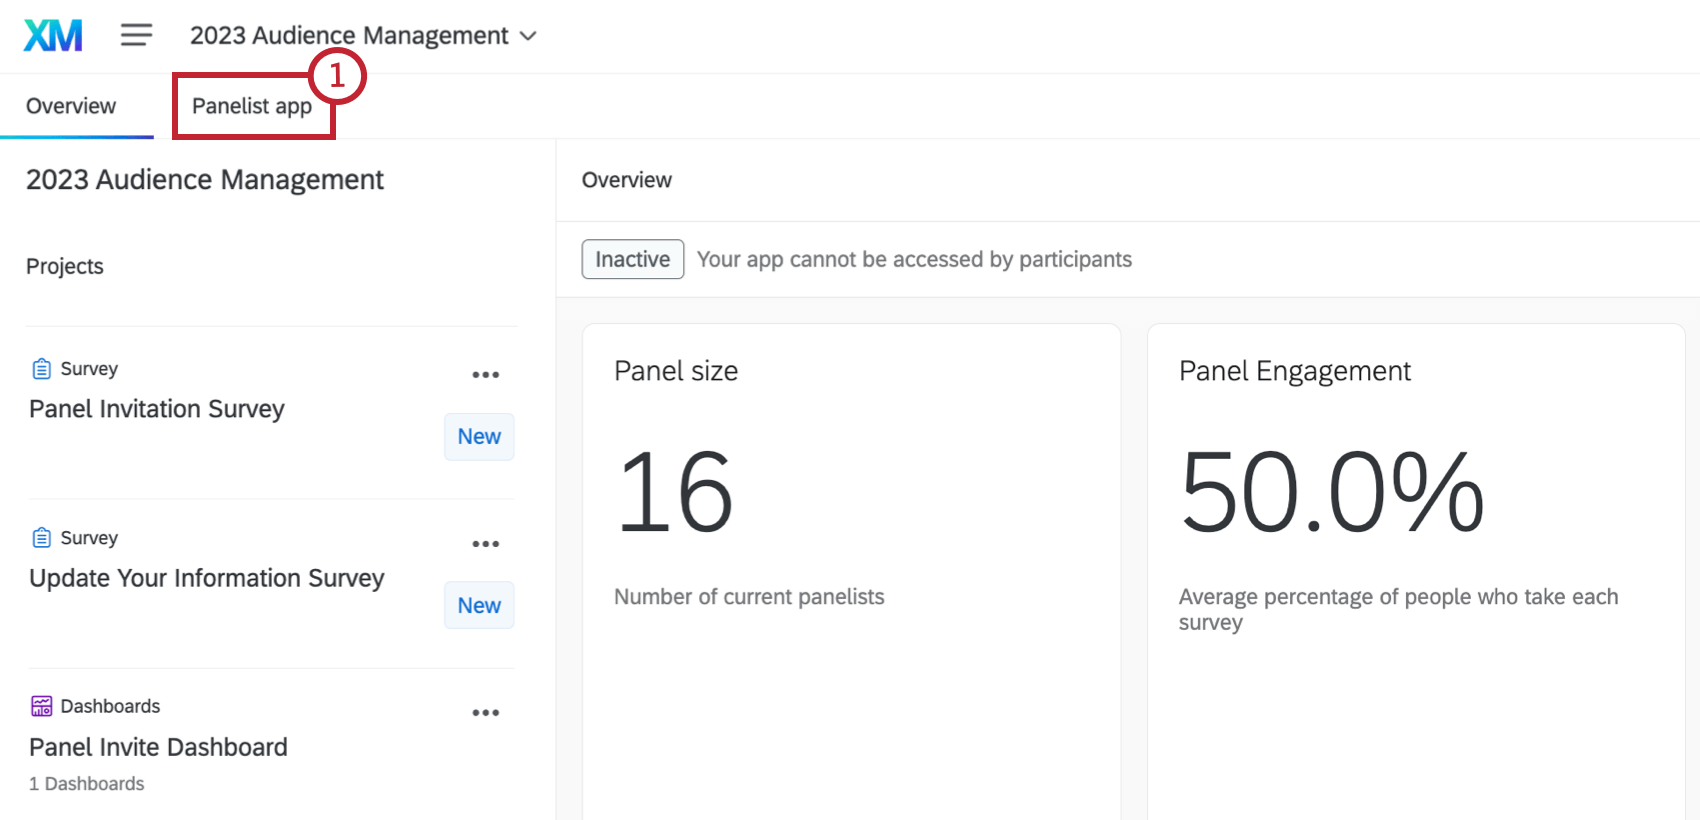
Navigating the Program
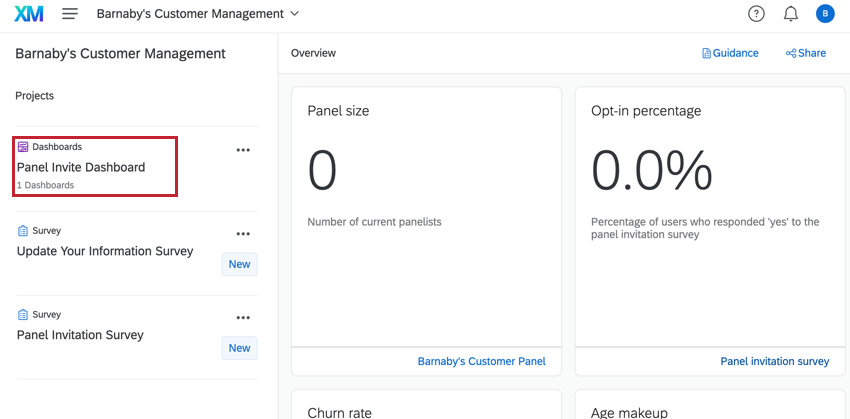
You’ll be brought to the program overview page after creating your program. On this page:
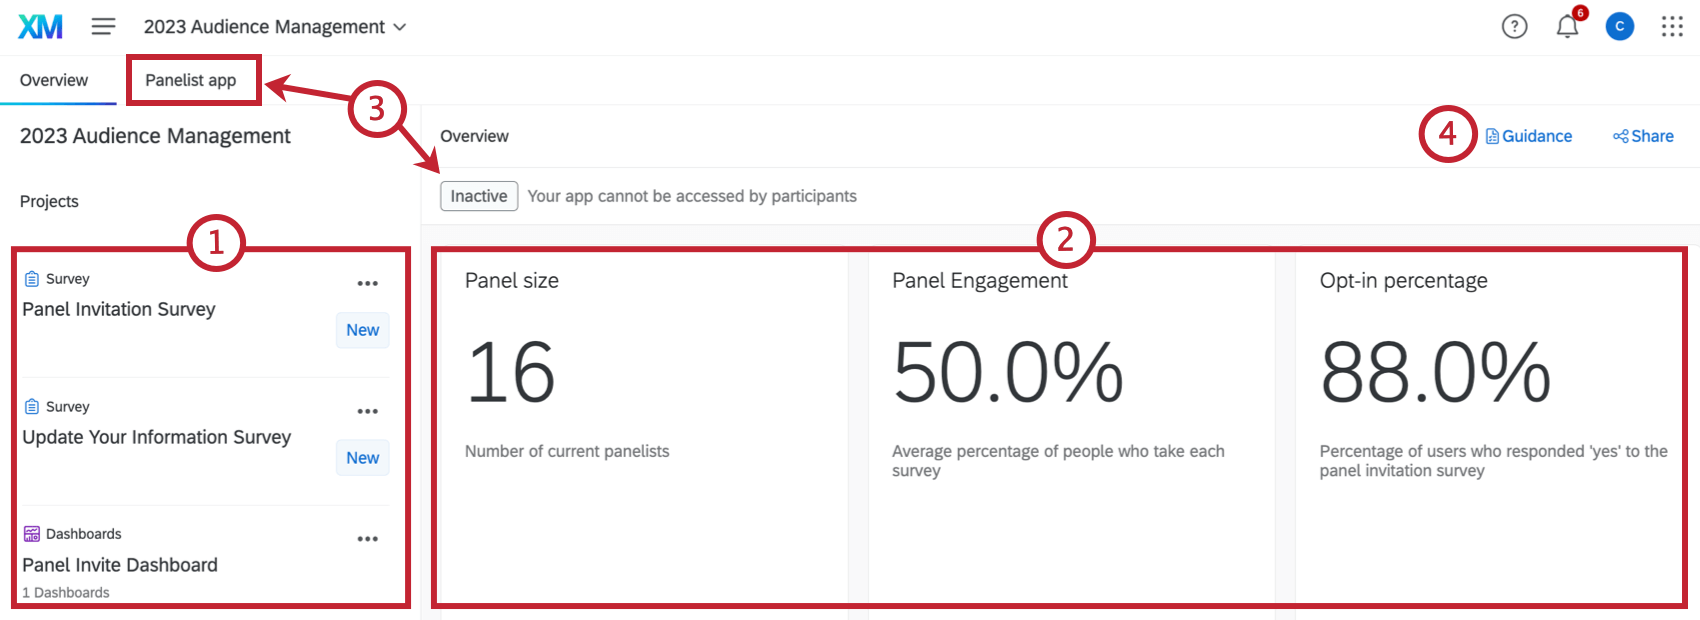
- Your 2 surveys and your dashboard will appear in a list on the left hand side. Click on any of these to open them.
- The right hand side of the page contains widgets that display information about your panel.
- The Panelist app tab will take you to a page where you can configure a landing page for panelists. The status of your app is also displayed above the panel widgets.
- If you are unsure about what to do next, click Guidance to open a panel with more instructions.
Overview Page Widgets
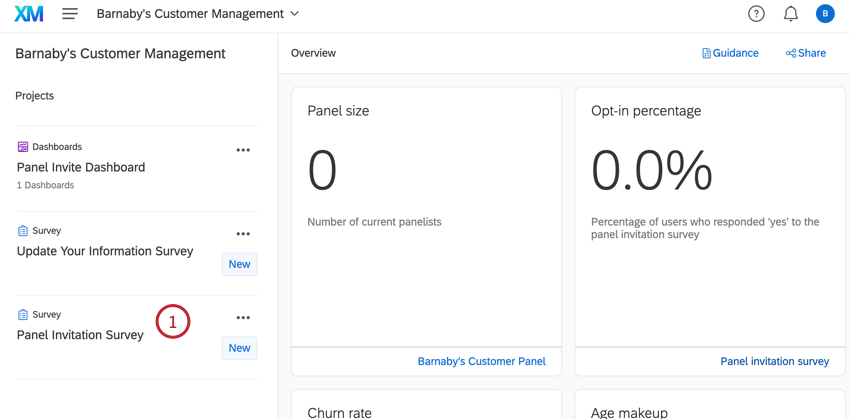
The widgets on the overview page display the following information about your panel:
- The number of contacts in the panel.
- The percentage of contacts who responded “yes” to the invitation survey.
- The percentage of contacts who opted-out after joining the panel.
- Churn rate over time, which shows the number of contacts added and opted-out each month.
- Engagement over time, which shows your panel’s email open rate, response rate, and opt-out rate each month.
- Contact frequency, which shows the percentage of contacts that have been contacted more than 1 time, less than 1 time, and exactly 1 time over the past 30 days.
- The age and gender demographics of your panel.
You can click the link in the bottom right hand corner of a given widget to be brought to the data source for that widget (i.e., the contact list or the invitation survey).
Adding Customized Questions
You can customize the audience management program with additional questions of your choice. This section covers how to add additional questions and map the responses back to fields in XM Directory.
- From the program overview page, click your survey.
- In the survey editor, click Add new question where you want to add your question.
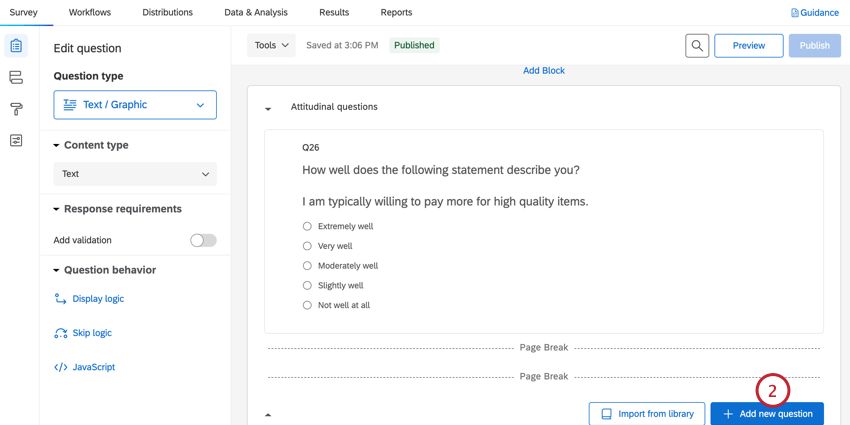
- Create your question. For easy data collection, we recommend either a multiple choice question for respondents to choose an answer, or a text entry question for respondents to enter their own response.
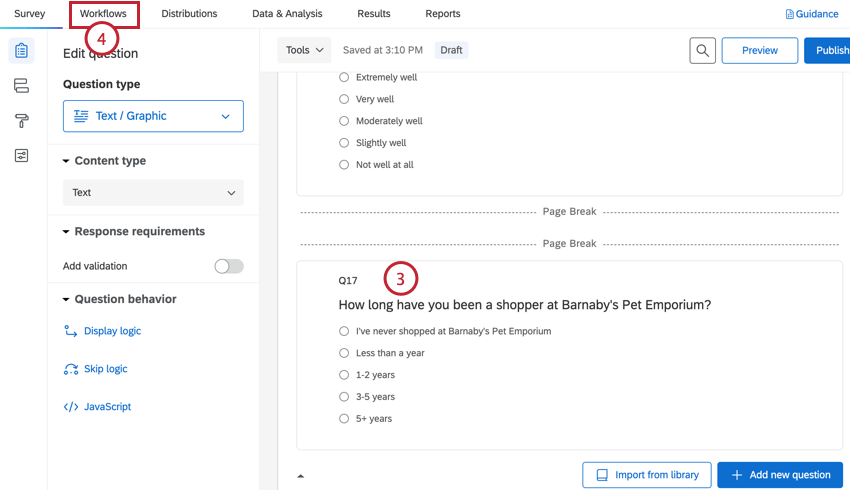
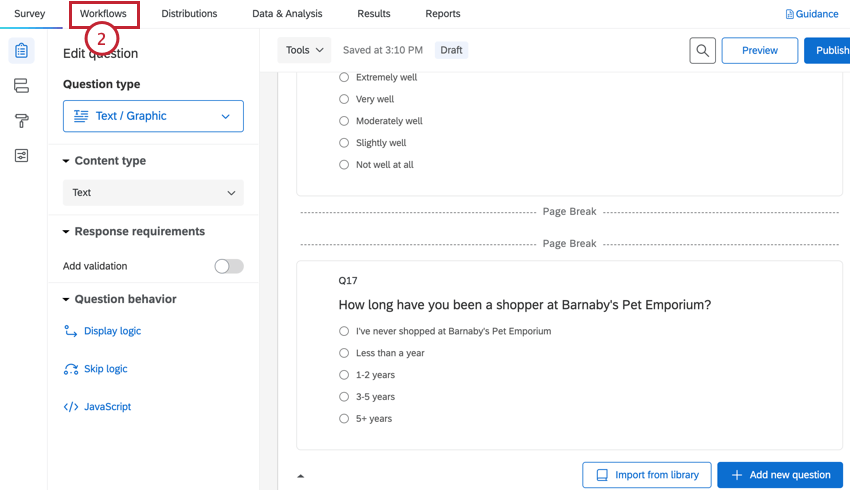
- Navigate to Workflows.
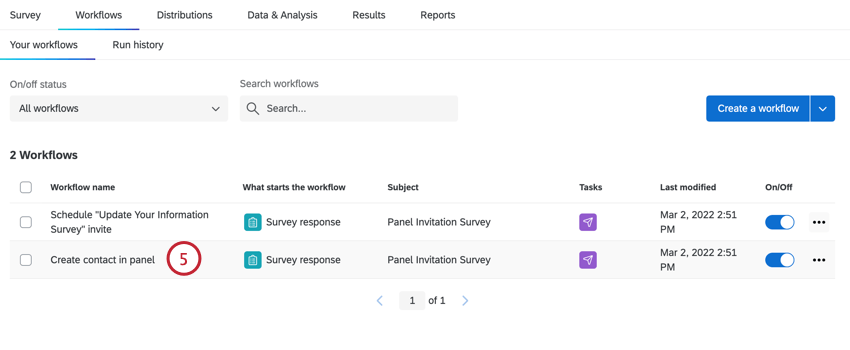
- Select the workflow that sends contact information to XM Directory. Depending on what you chose during the initial setup, this will be called either “Create contact in panel” or “Update contact in panel.”
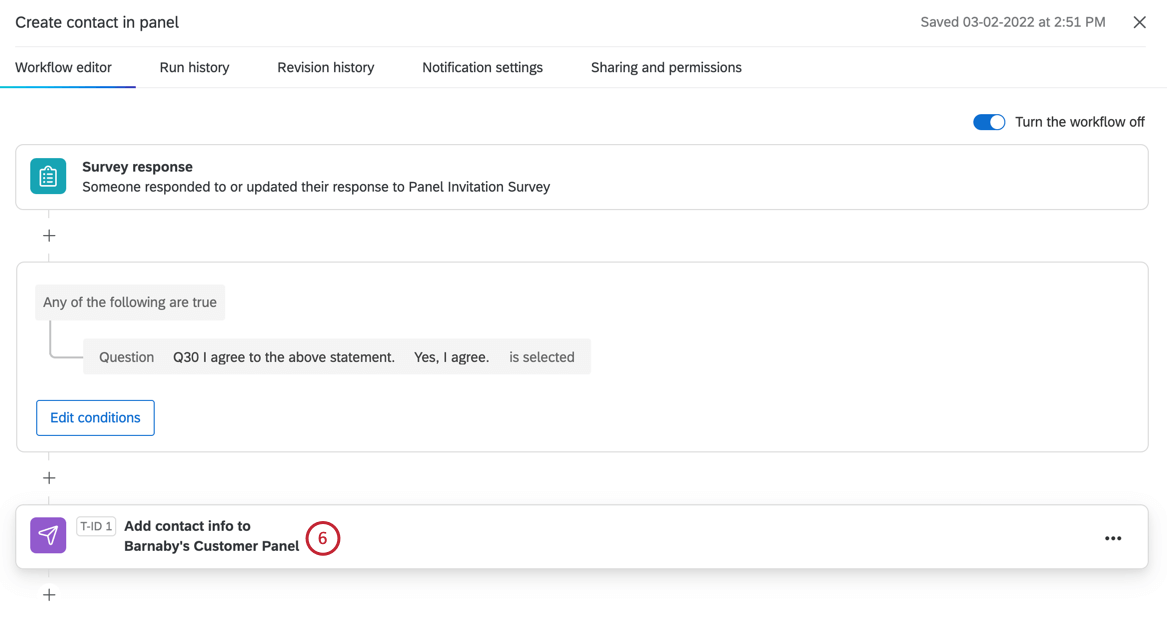
- Choose the Add contact info task.
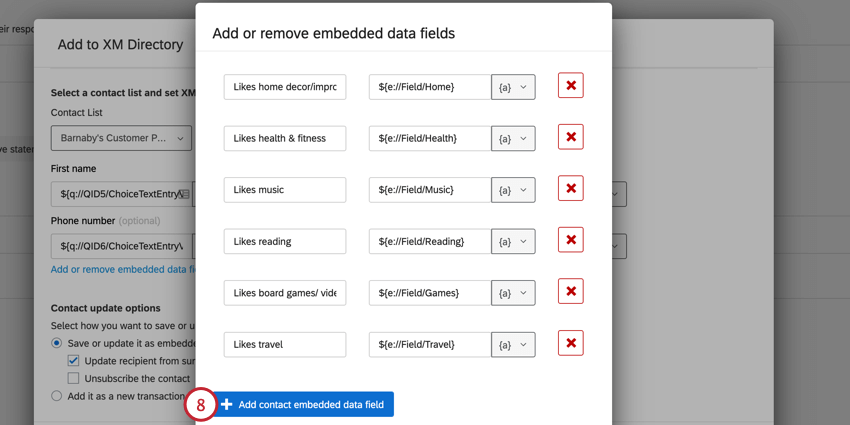
- Click Add or remove embedded data fields.
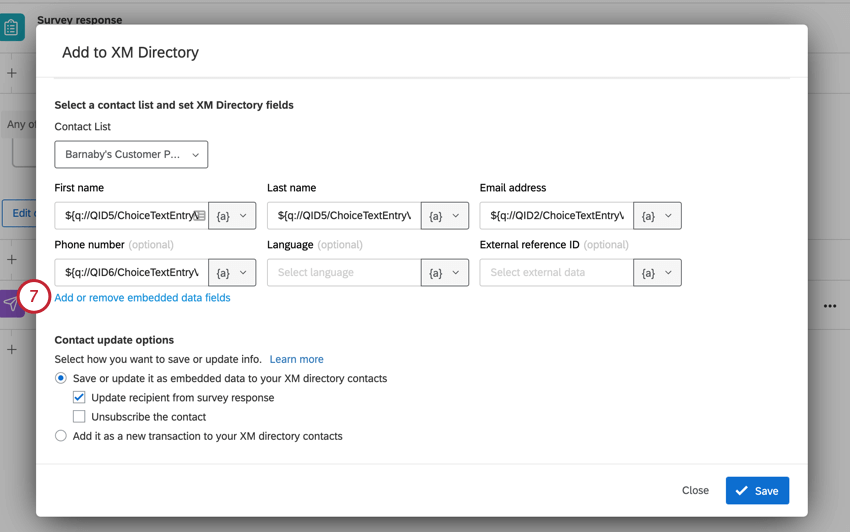
- Scroll down to the bottom of the list and click Add contact embedded data field.
- Enter the field name as you’d like it to appear in XM Directory.
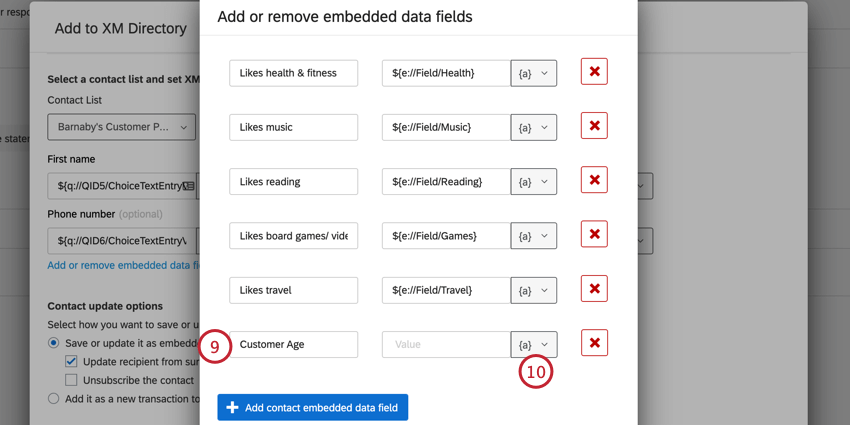
- Click the piped text icon, {a}.
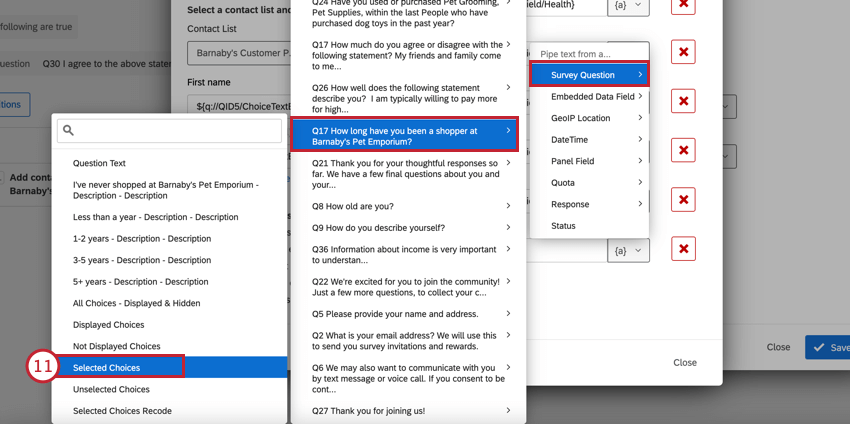
- In the Survey Question menu, find your newly added question and choose the respondent’s answer from the list of options.
- Click Close.
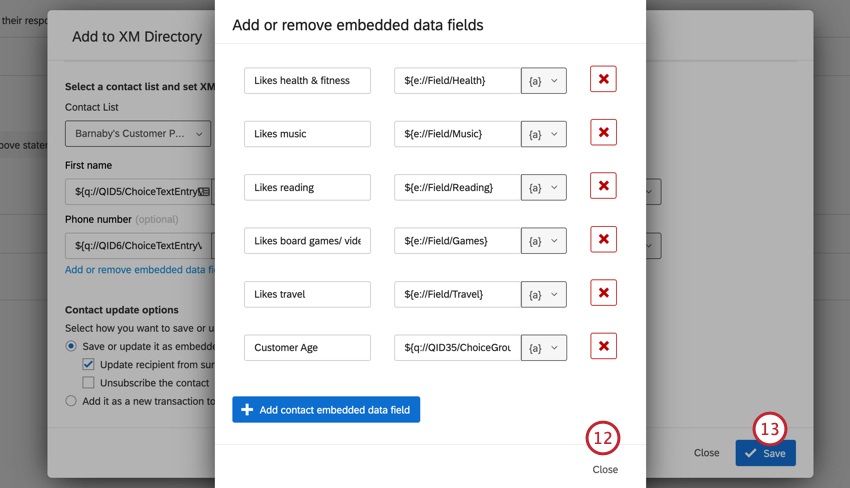
- Click Save.
Please note that custom questions will not be automatically reflected in your dashboard. To add this data to your dashboard, you must map these fields to your dashboard. See Mapping CX Dashboard Data for more information.
For additional information on survey editing, see Survey Basic Overview.
Choosing the Update Survey Schedule
If you opted into automating your update survey, you have the option to send the survey every 3, 6, 9 or 12 months. However, you can change this schedule to a custom time frame.
- From the program overview page, click your invite survey.
- Go to Workflows.
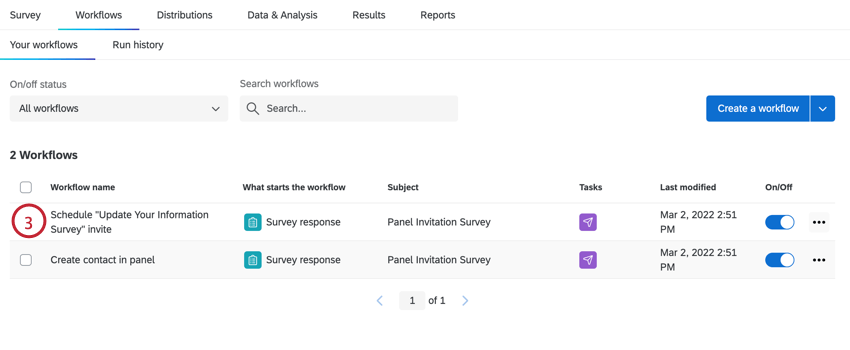
- Choose the Schedule “Update Your Information Survey” invite workflow.
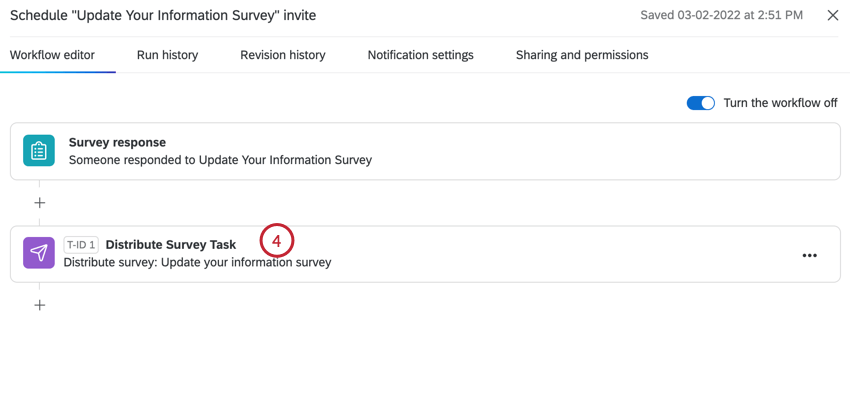
- Click the Distribute Survey Task.
- Change the schedule timeframe for when the update survey should be sent.
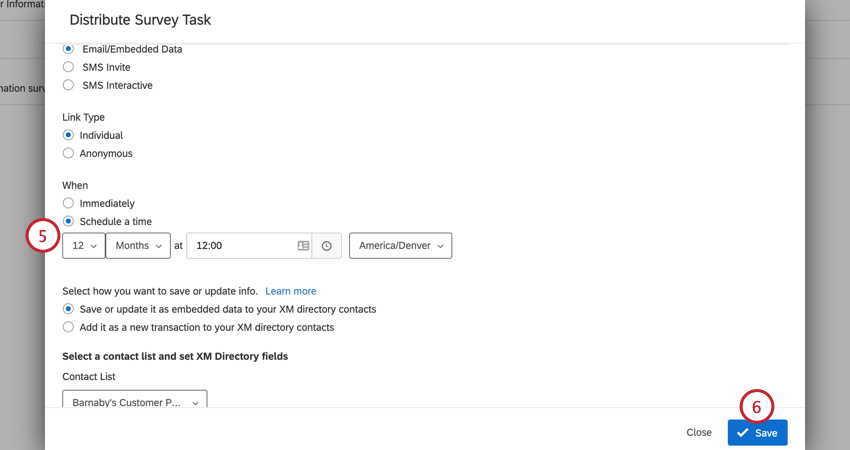
- Click Save.
Customizing the Panelist App
You can customize the app that panelists use to see available studies. This section covers how to set up the app and add survey projects. Once the app is set up, panelists can use it as a centralized place to view all surveys available to them.
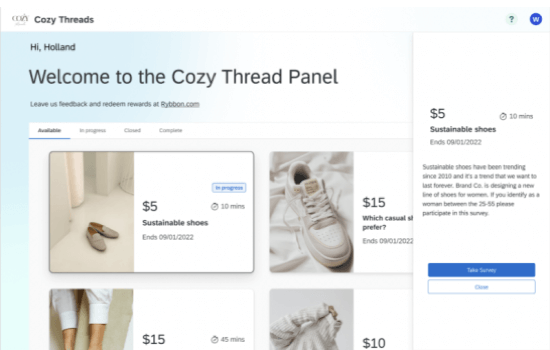
You can share a link to the app with panelists or choose to notify them when new surveys are added to the app. To access the app, panelists can sign in to their existing account or create a new one.
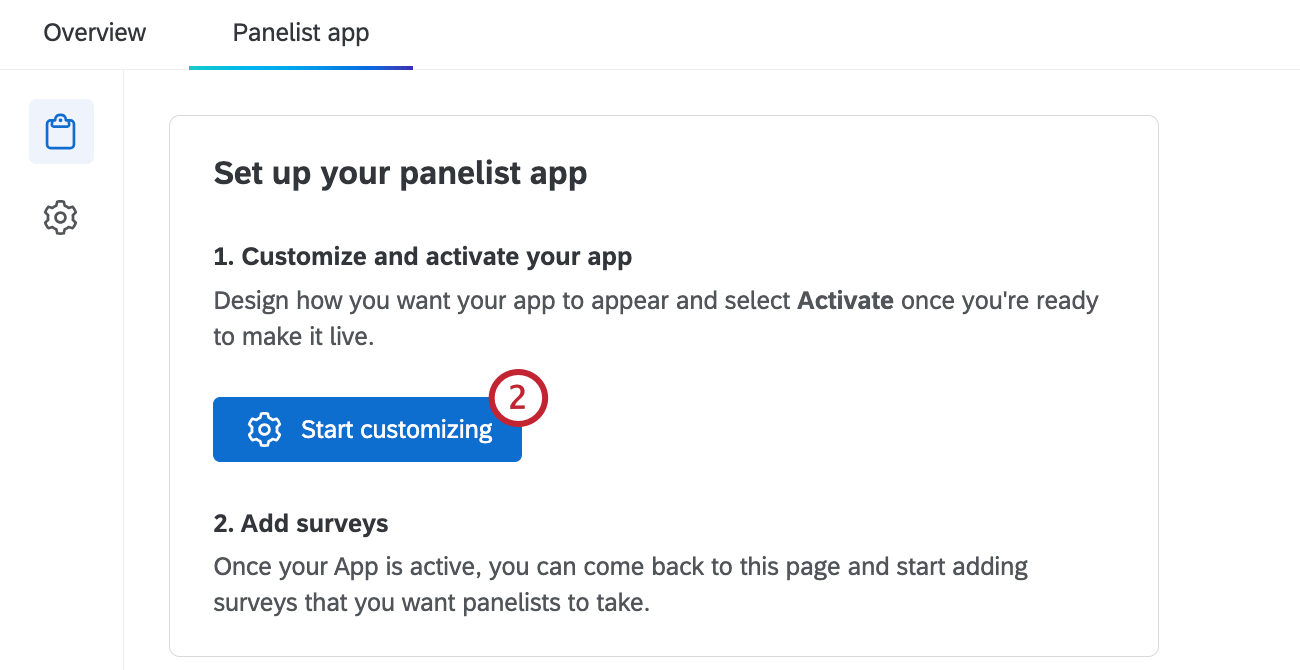
Setting up the App
- From the program overview page, click the Panelist app tab.
- Select Start customizing. As you customize your app, the app preview will update automatically.
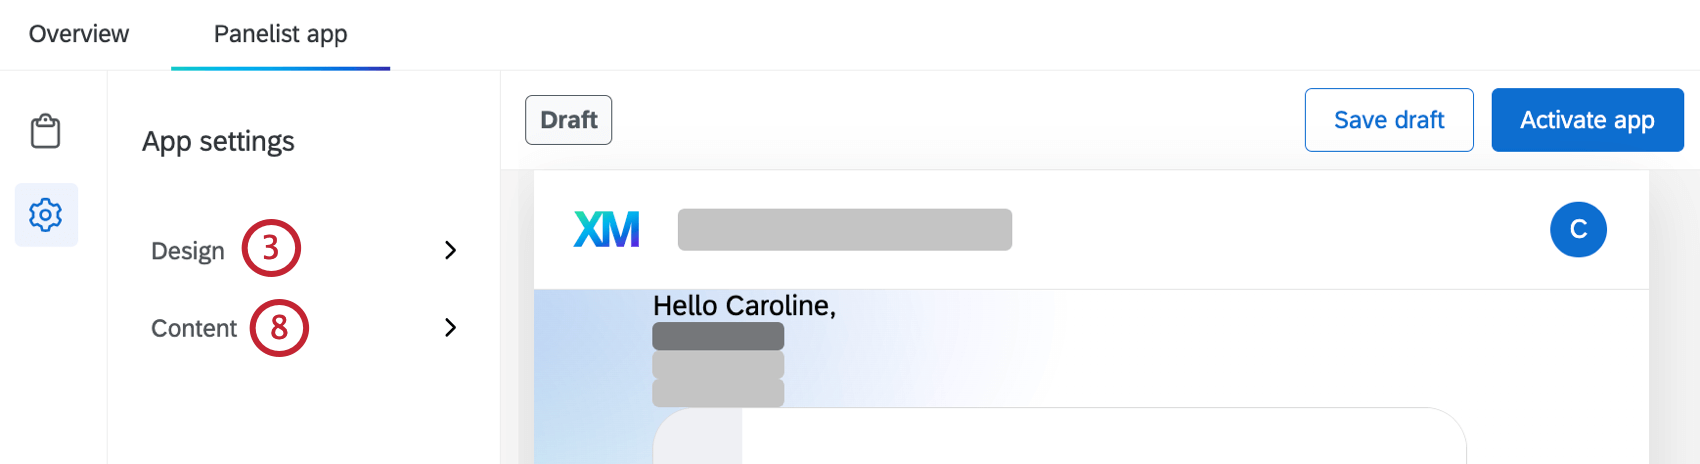
- To add a logo, click Design within the App Settings section.
- Click Add logo.
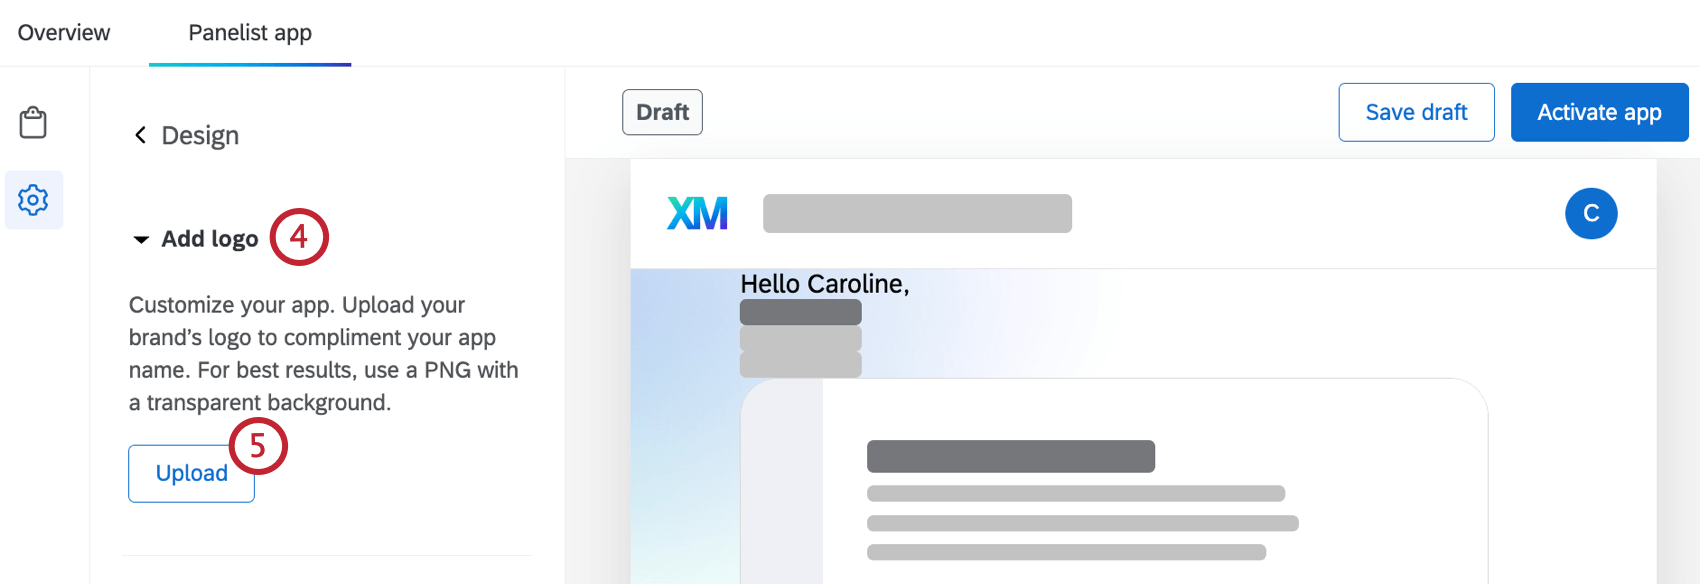
- Select Upload.
- Select an existing logo image from a library, or click Choose file to upload a new image. See Library Graphics for more information on uploading images to your library.
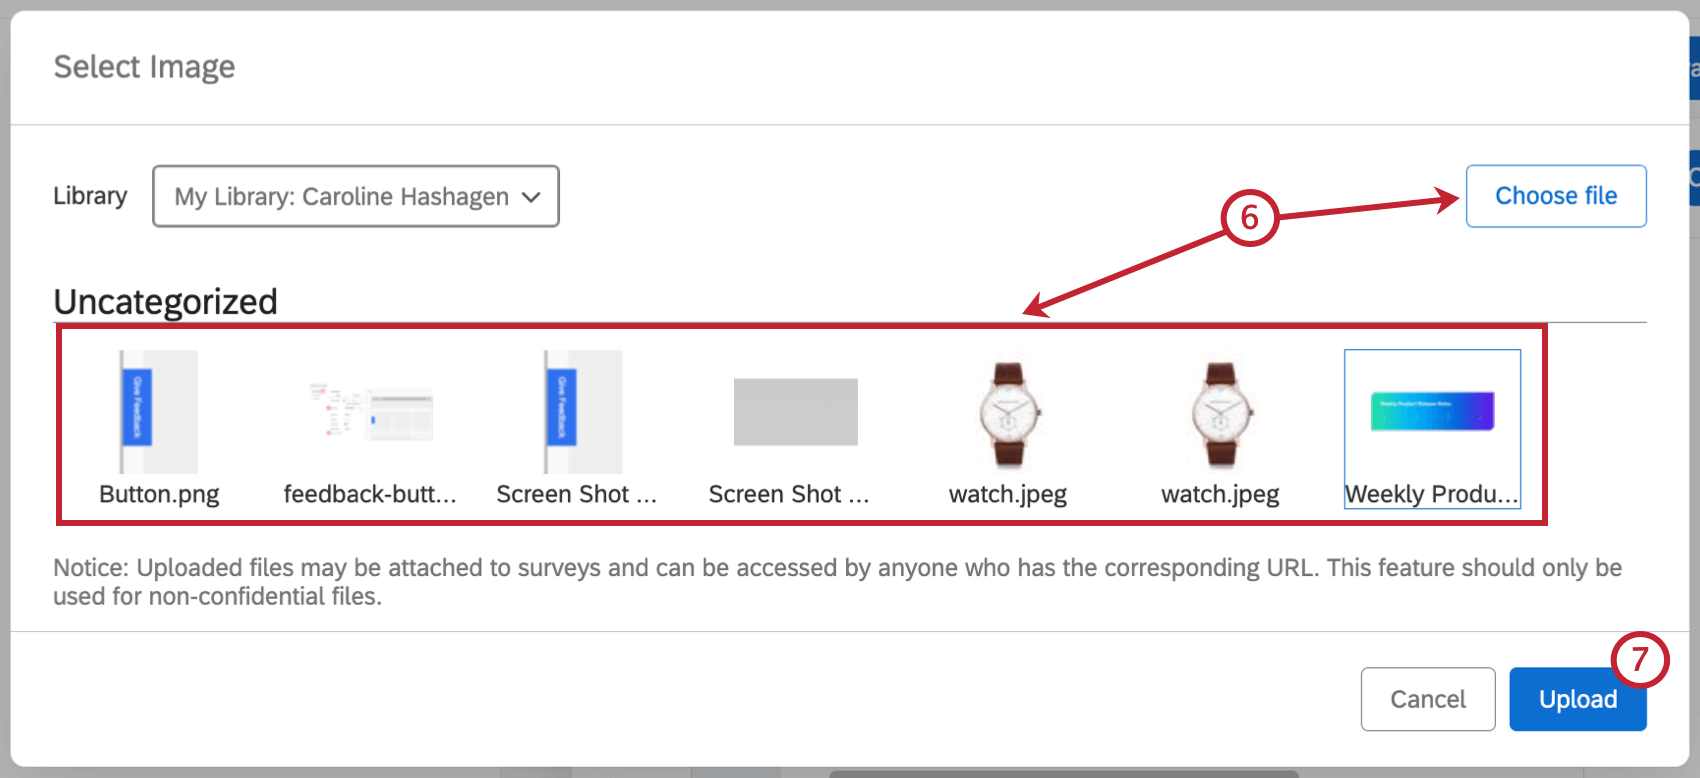
- Click Upload.
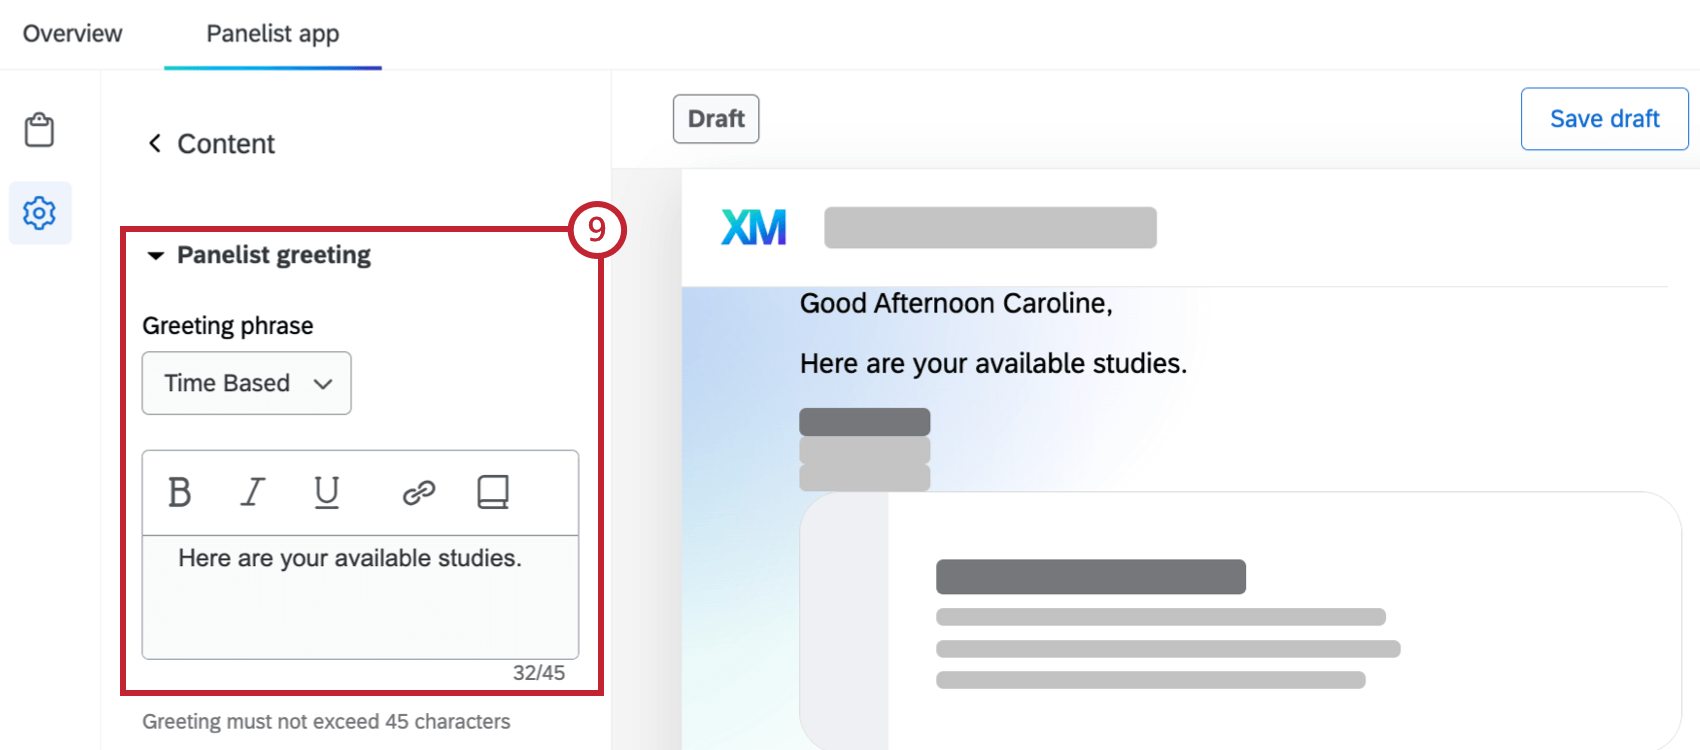
- To add a greeting or support information, click Content within the App Settings section.
- To add a panelist greeting, select Panelist greeting and enter your greeting. Use the dropdown to select the greeting phrase, and the menu bar to format your greeting.
 Qtip: Click the book icon to load a message from your library. See Library Messages for more information on adding messages to your library.
 - To add support contact information, select Add support contact and enter the email of a contact from your organization that will appear in the help menu.
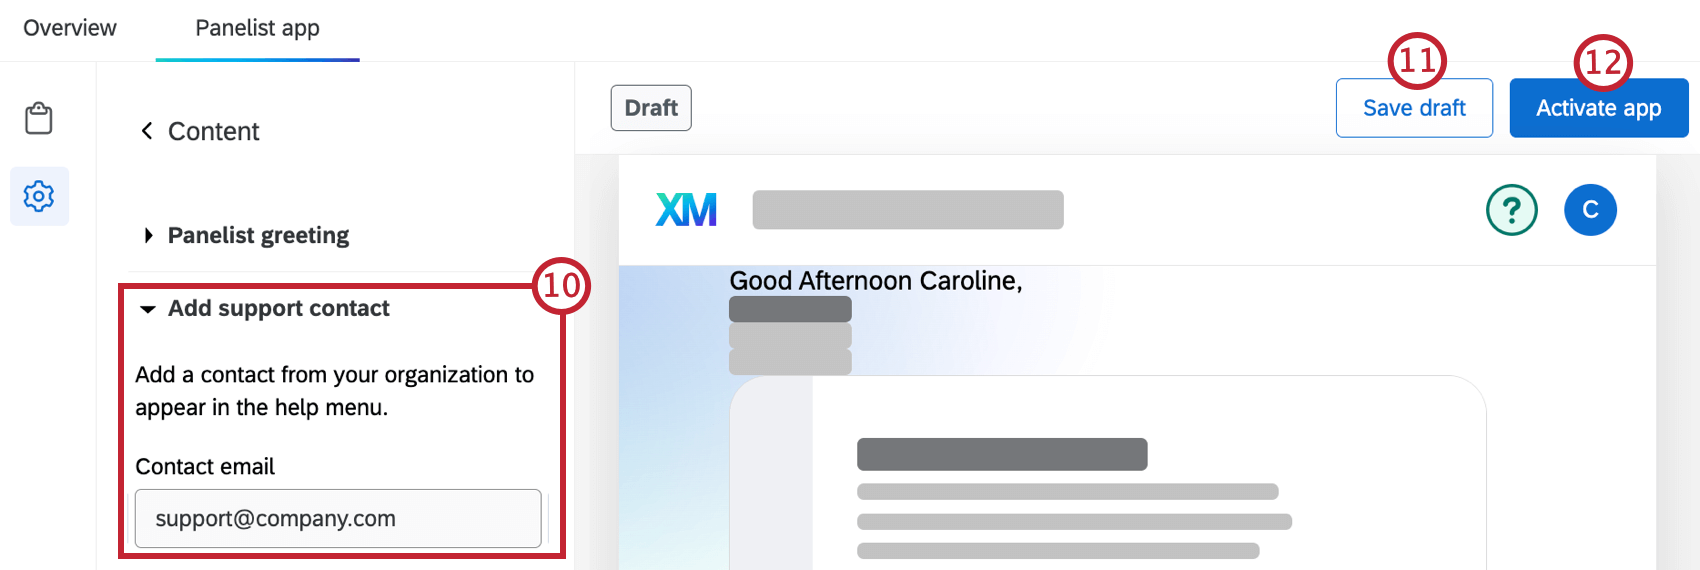
- To save your changes as a draft, click Save draft.
- To activate the app for panelists, select Activate app. Once your app is active, click Publish changes to save any changes you make.
Adding Surveys to the App
- Navigate to the App surveys section of the Panelist app tab.
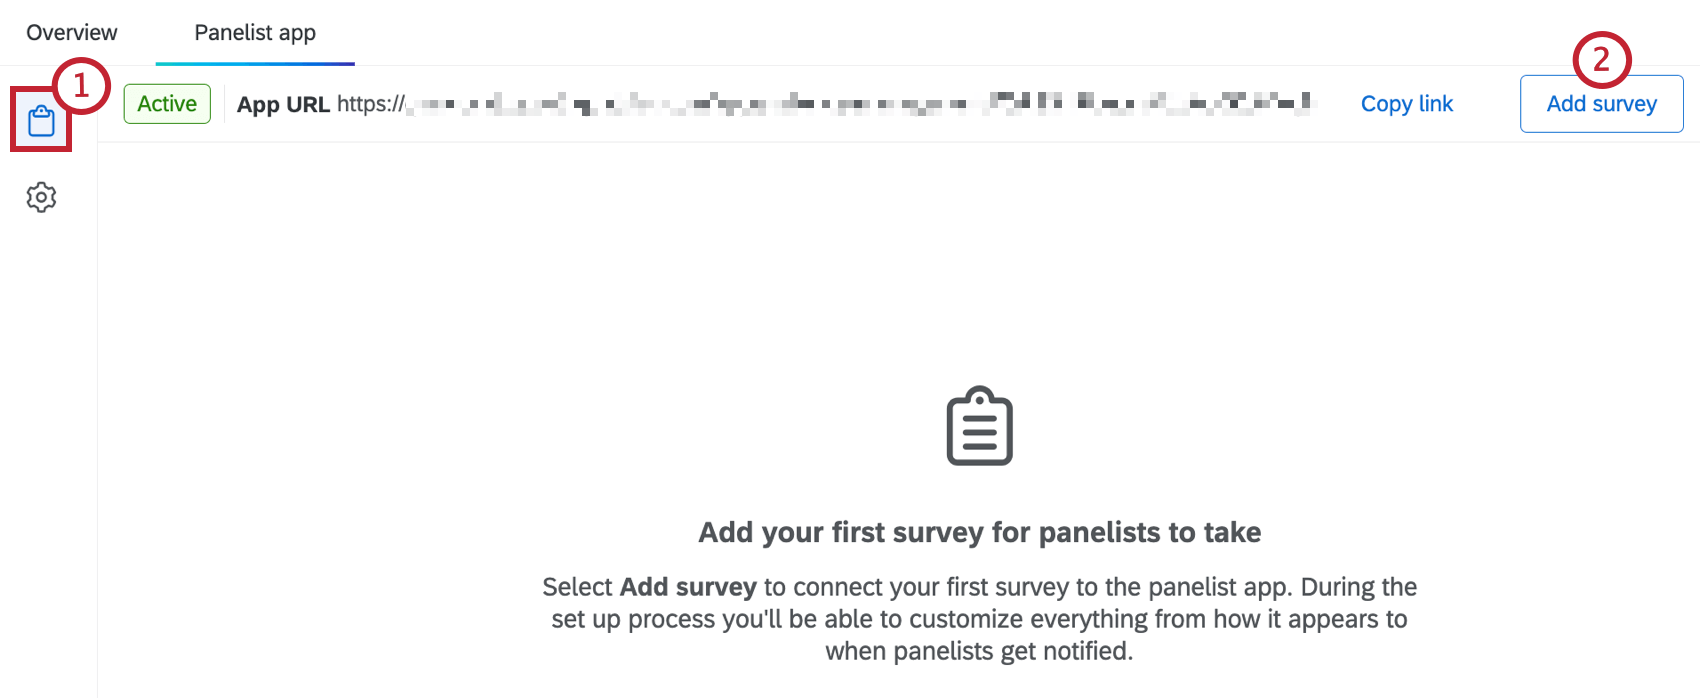
- Click Add survey.
- Select the survey from your project to add to the app.
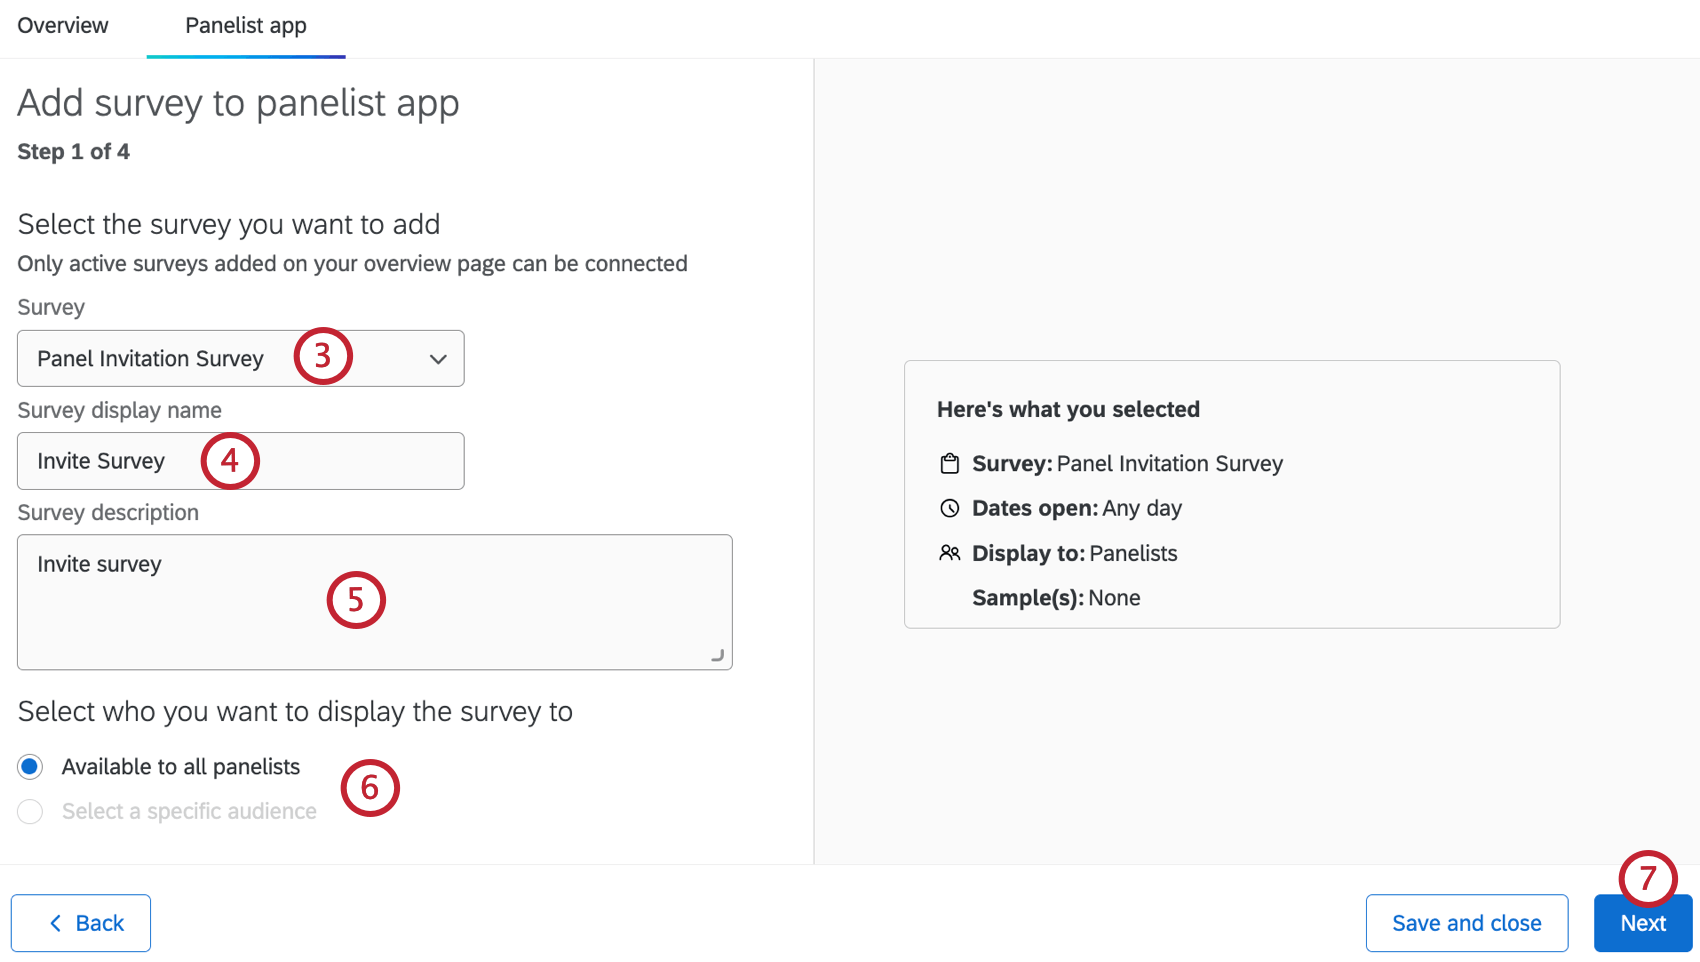
- Enter a display name for the survey.
- Enter a description for the survey.
- Select who to display the survey to. You can display it to all panelists or select a sample.
- Click Next.
- If desired, click Add image and select an image from your library to display with your survey.
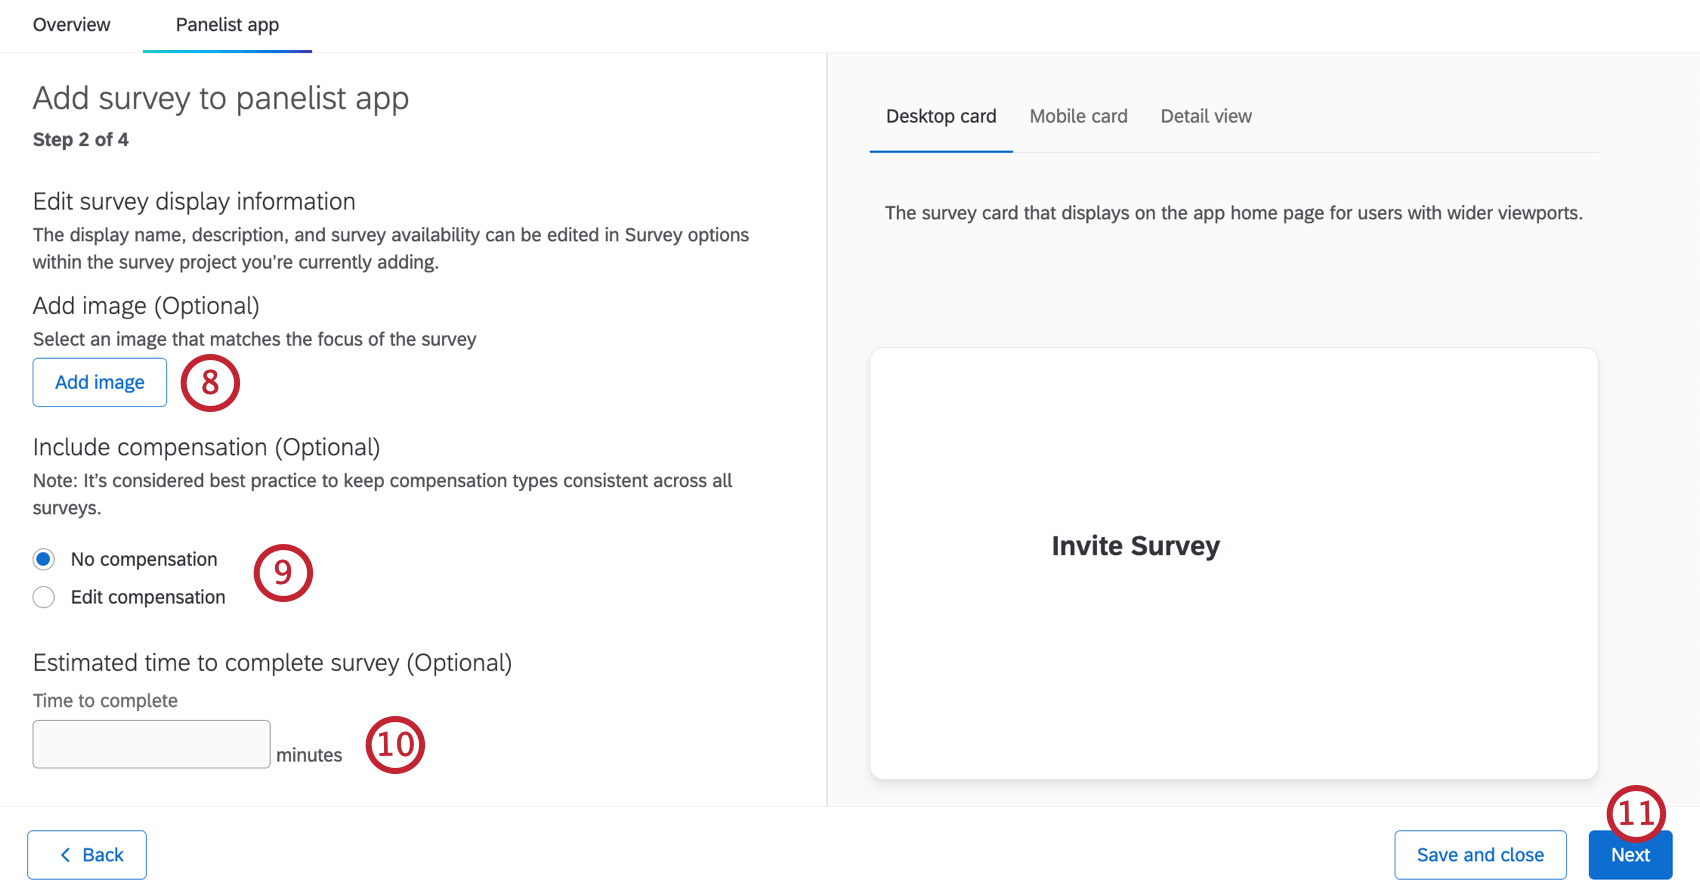
- If desired, add compensation to the survey. Select Edit compensation and enter an amount and type.
- If desired, enter the number of minutes it will take to complete the survey.
- Click Next.
- If you want to notify panelists there is a new survey, select Send an email notification. You can then customize the email message and when it will be sent.
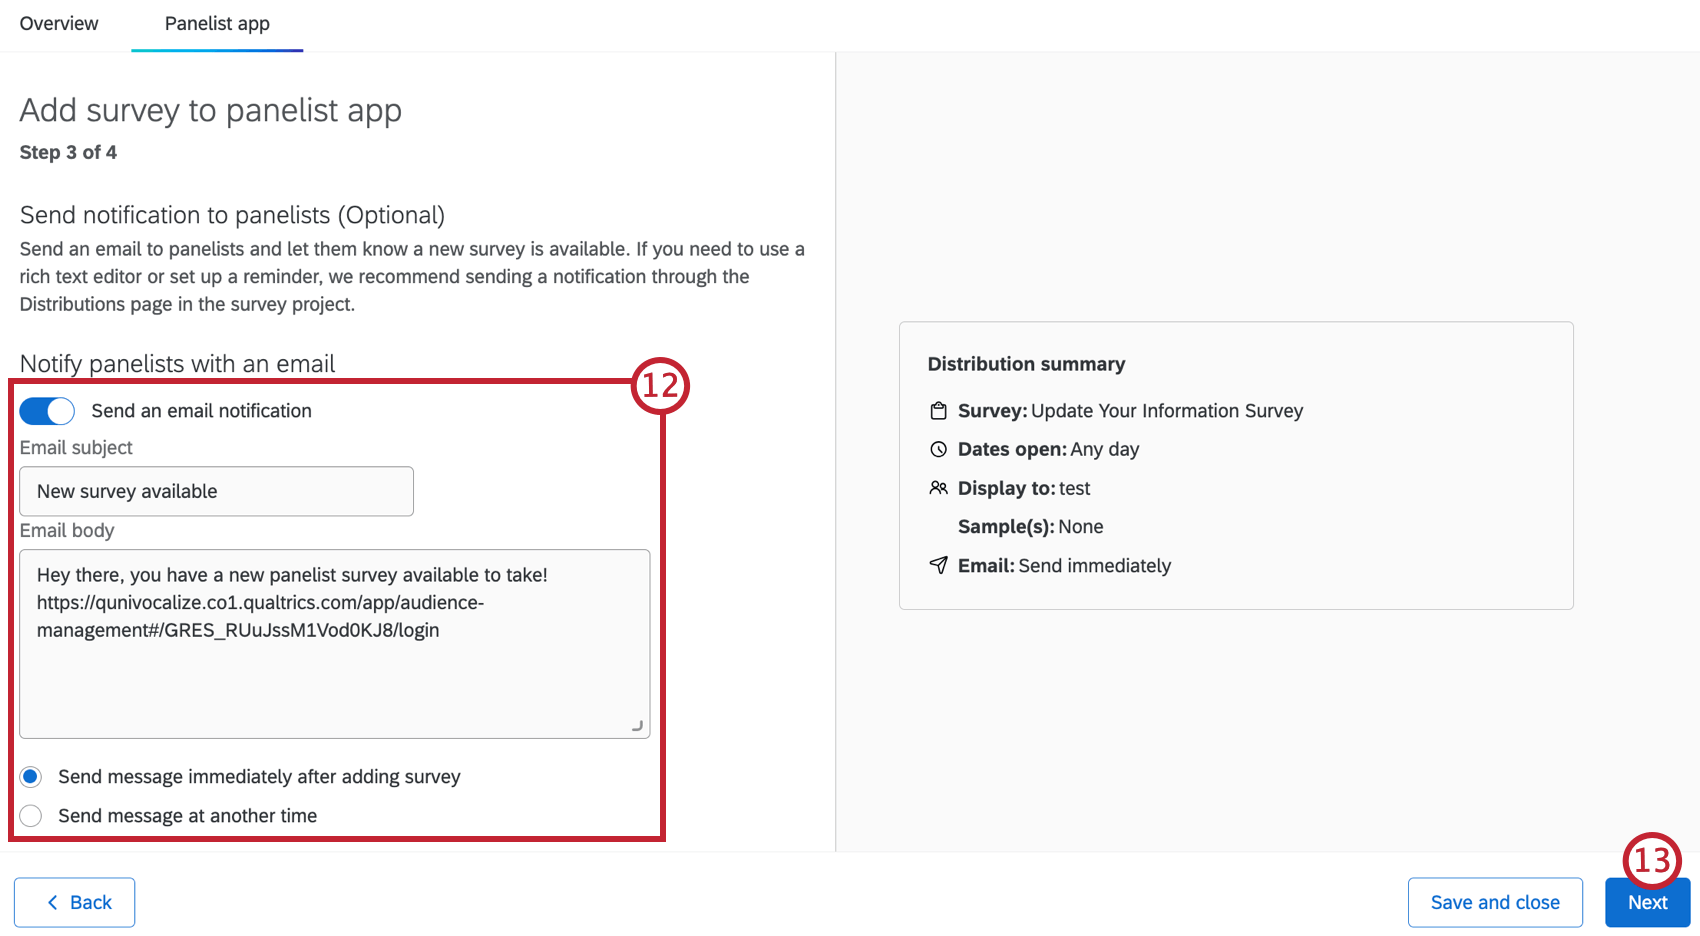
- Click Next.
- Review your survey details. Click the pencil icon next to an item to make edits.
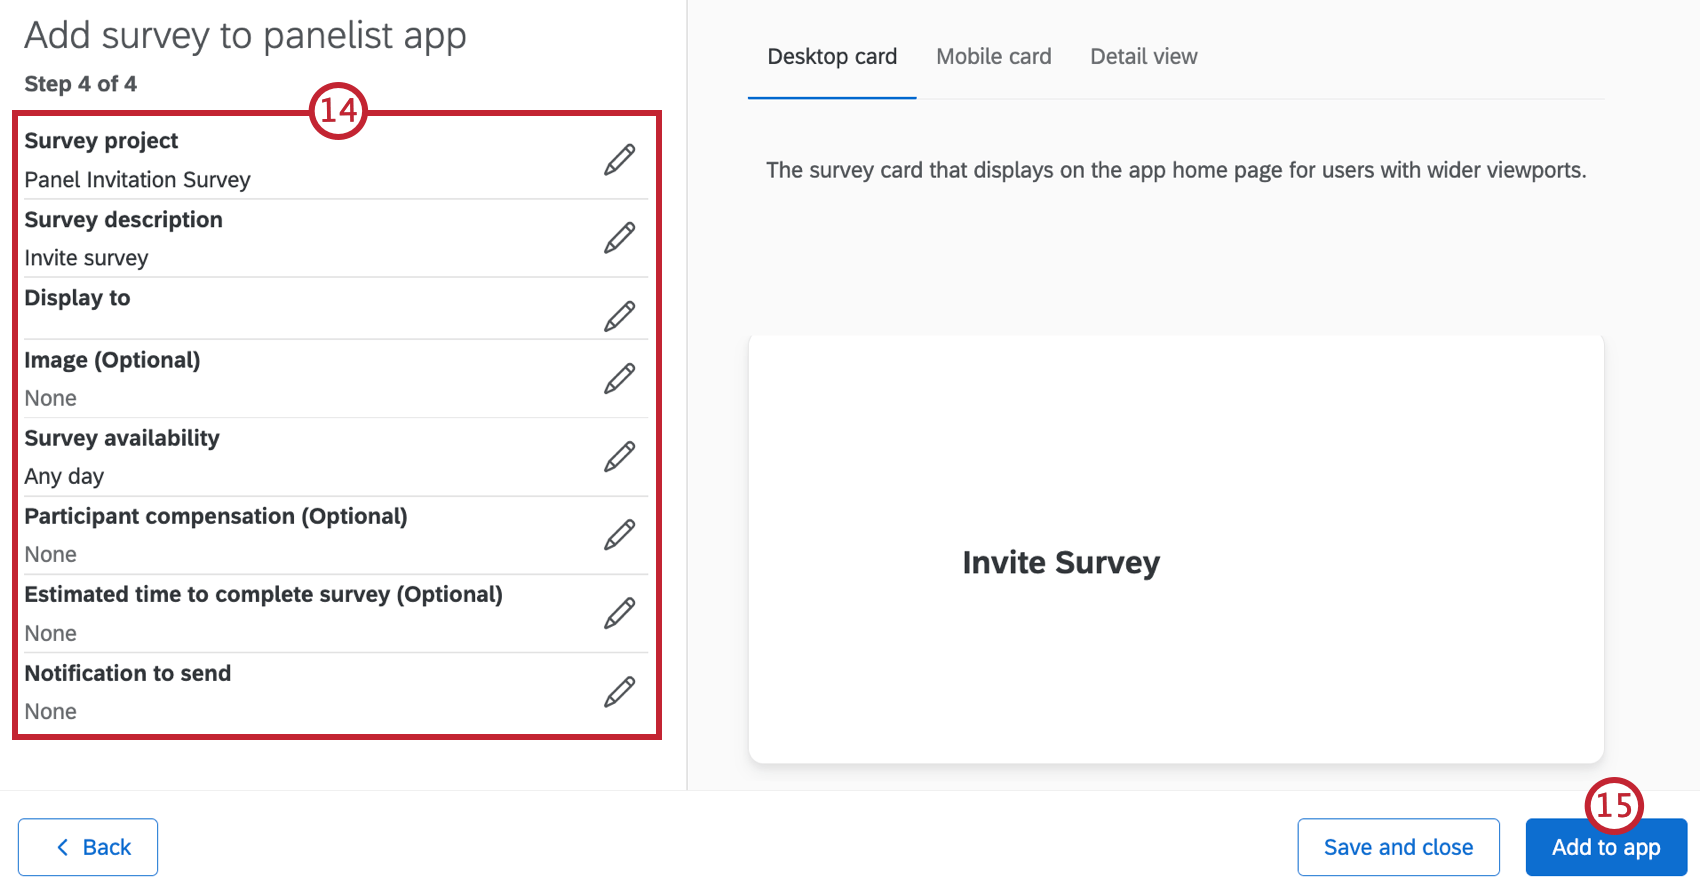
- Click Add to app.
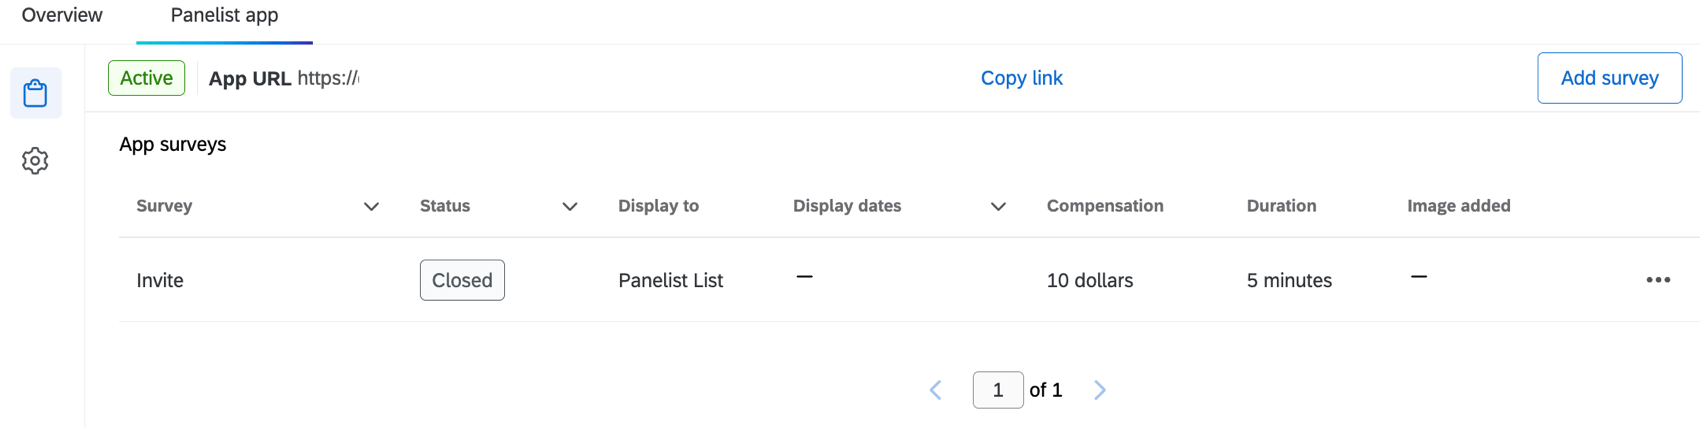
- Surveys you’ve added will appear in a list.
 Qtip: Click the 3 horizontal dots next to a survey to edit the survey, view distributions, or remove the survey from the app.
Dashboard
Our team of subject matter experts has developed a dashboard template for this program. This dashboard is designed to provide a summary of the demographics of your panel. When you’re ready, this dashboard can be found in your program’s project list.
Dashboard Editing
Check out these introductory pages to get started.