-

Customer Experience -

Employee Experience -

Brand Experience -

Core XM -

Design XM
Managing a Single Directory Contact
About Managing a Single Directory Contact
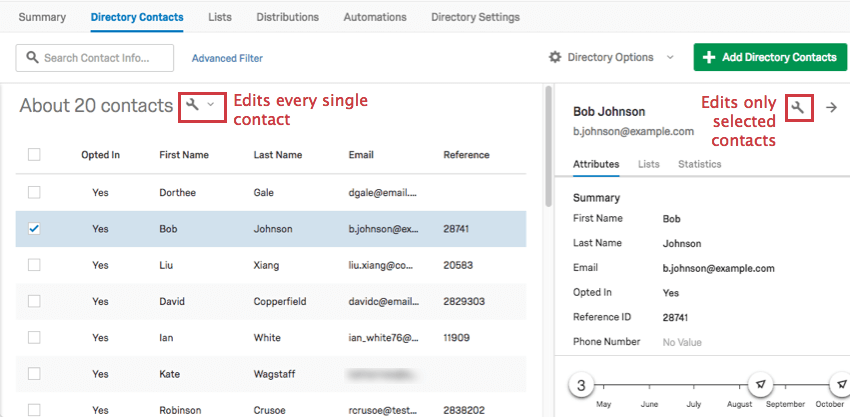
When you are inside the Directory Contacts tab, you can edit individual contacts by selecting the checkbox to their left.
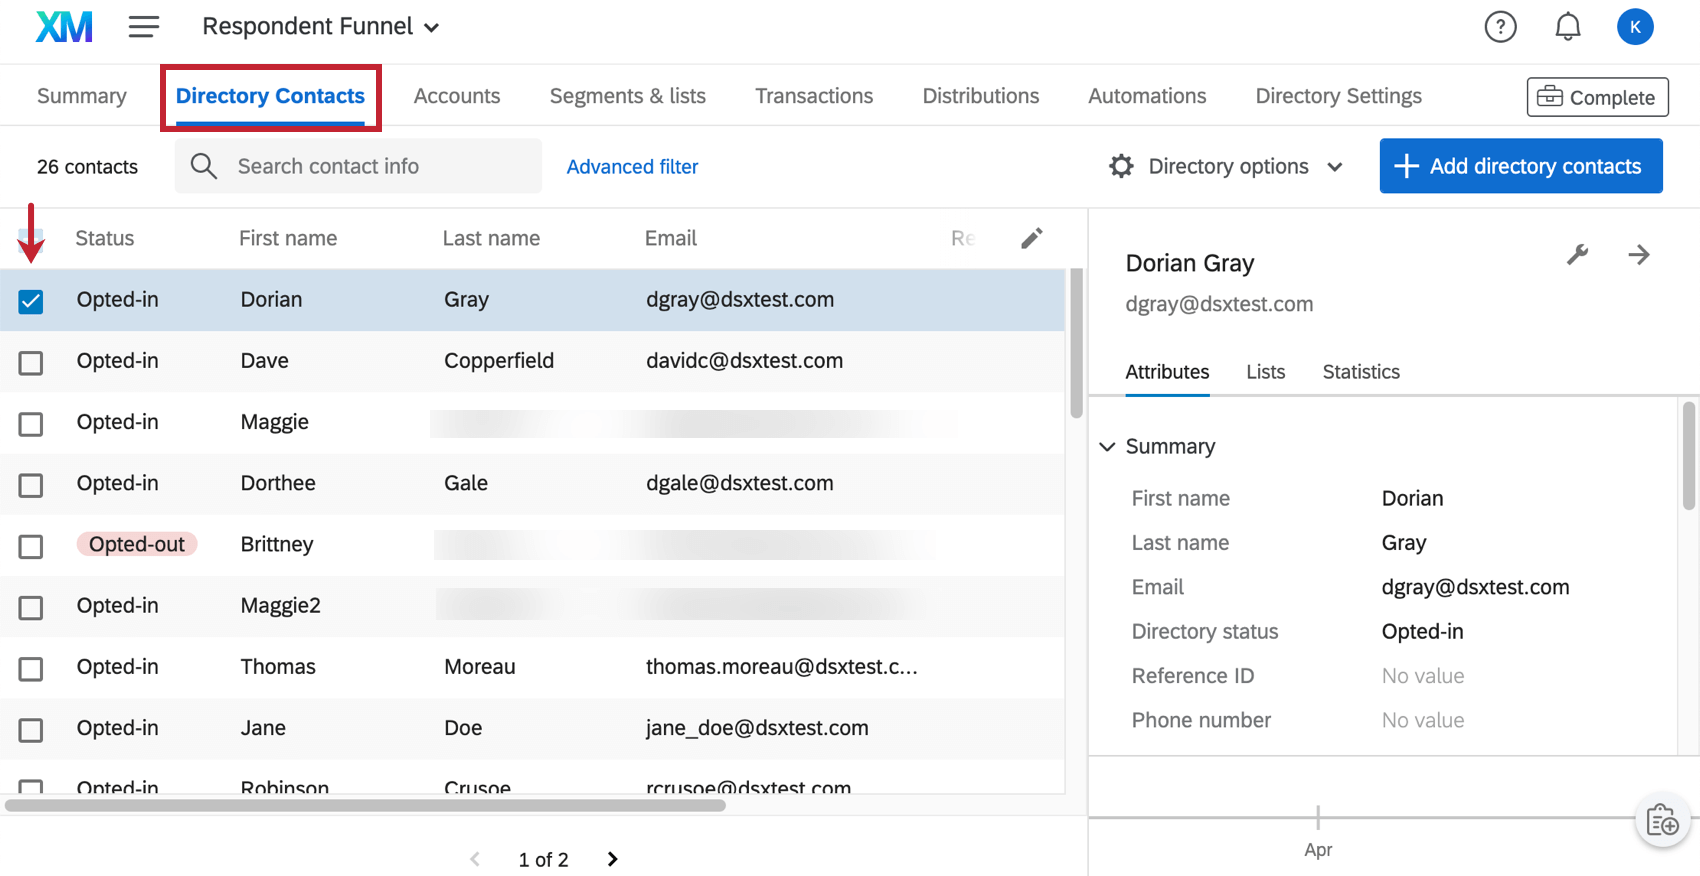
When you select a directory contact, a menu opens to the right containing information about the contact.
Contact Attributes and Editing a Contact
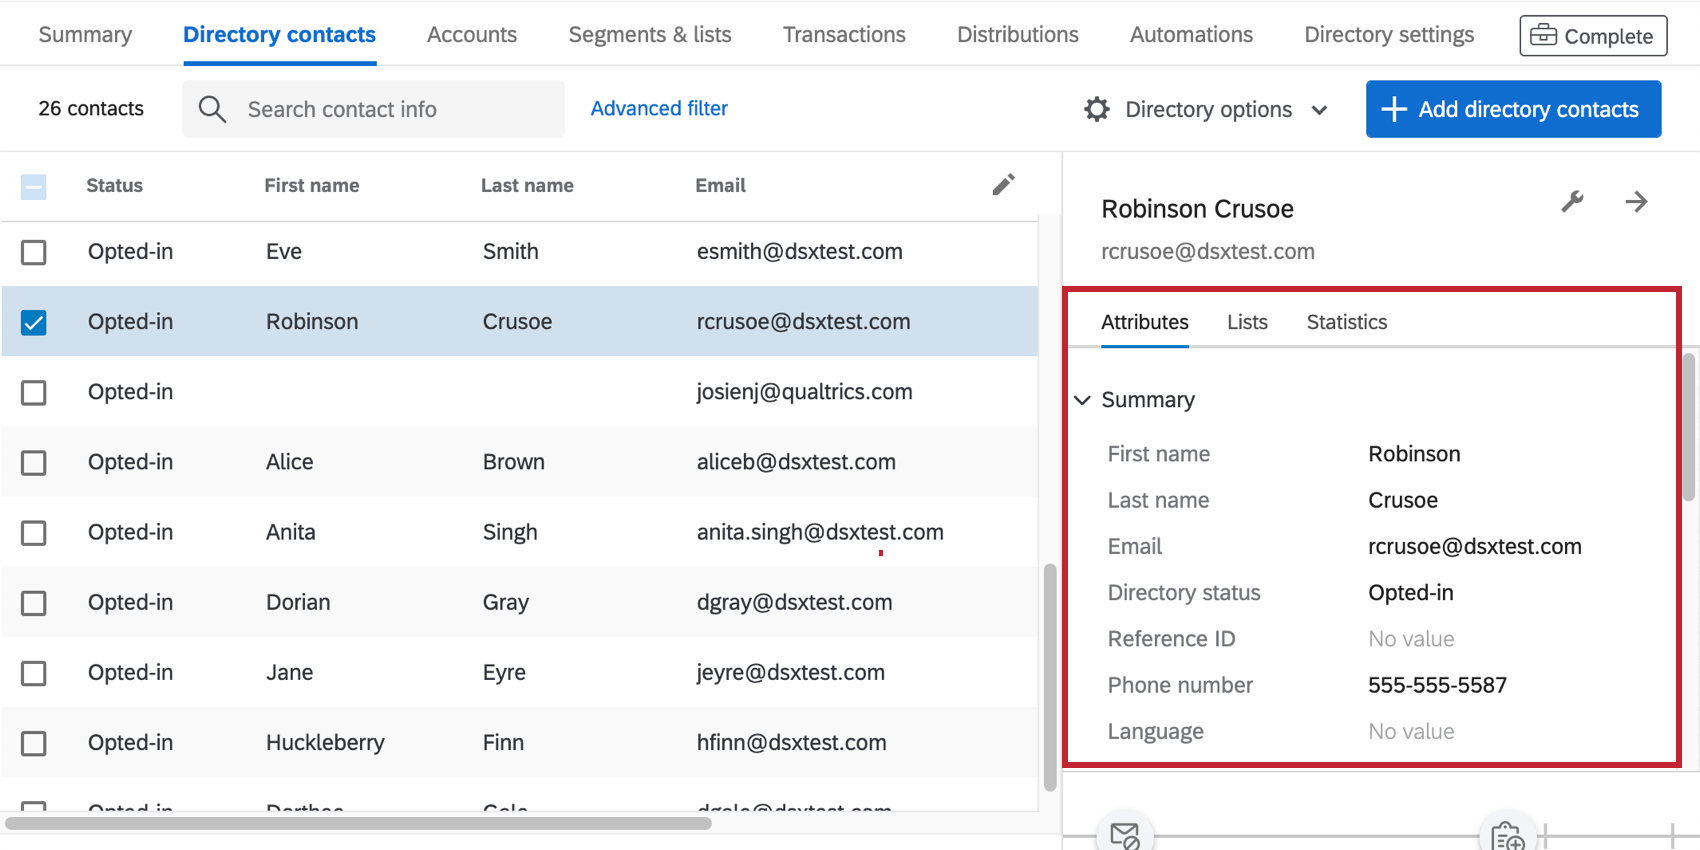
The Attributes section contains contact information such as the following editable fields:
- First Name
- Last Name
- Directory status (whether the contact is opted in or out)
- Reference ID (External Data Reference)
- Phone Number
- Language
The “Summary” section contains the fields listed above. The “Demographics” section contains common demographic fields you may want to save to your contacts (which can be manually edited in the directory, or collected from certified questions). The “Embedded data” section displays the embedded data assigned to the contacts.
Editing a Contact’s Info
- Select the contact you wish to edit. Make sure only one contact is selected.
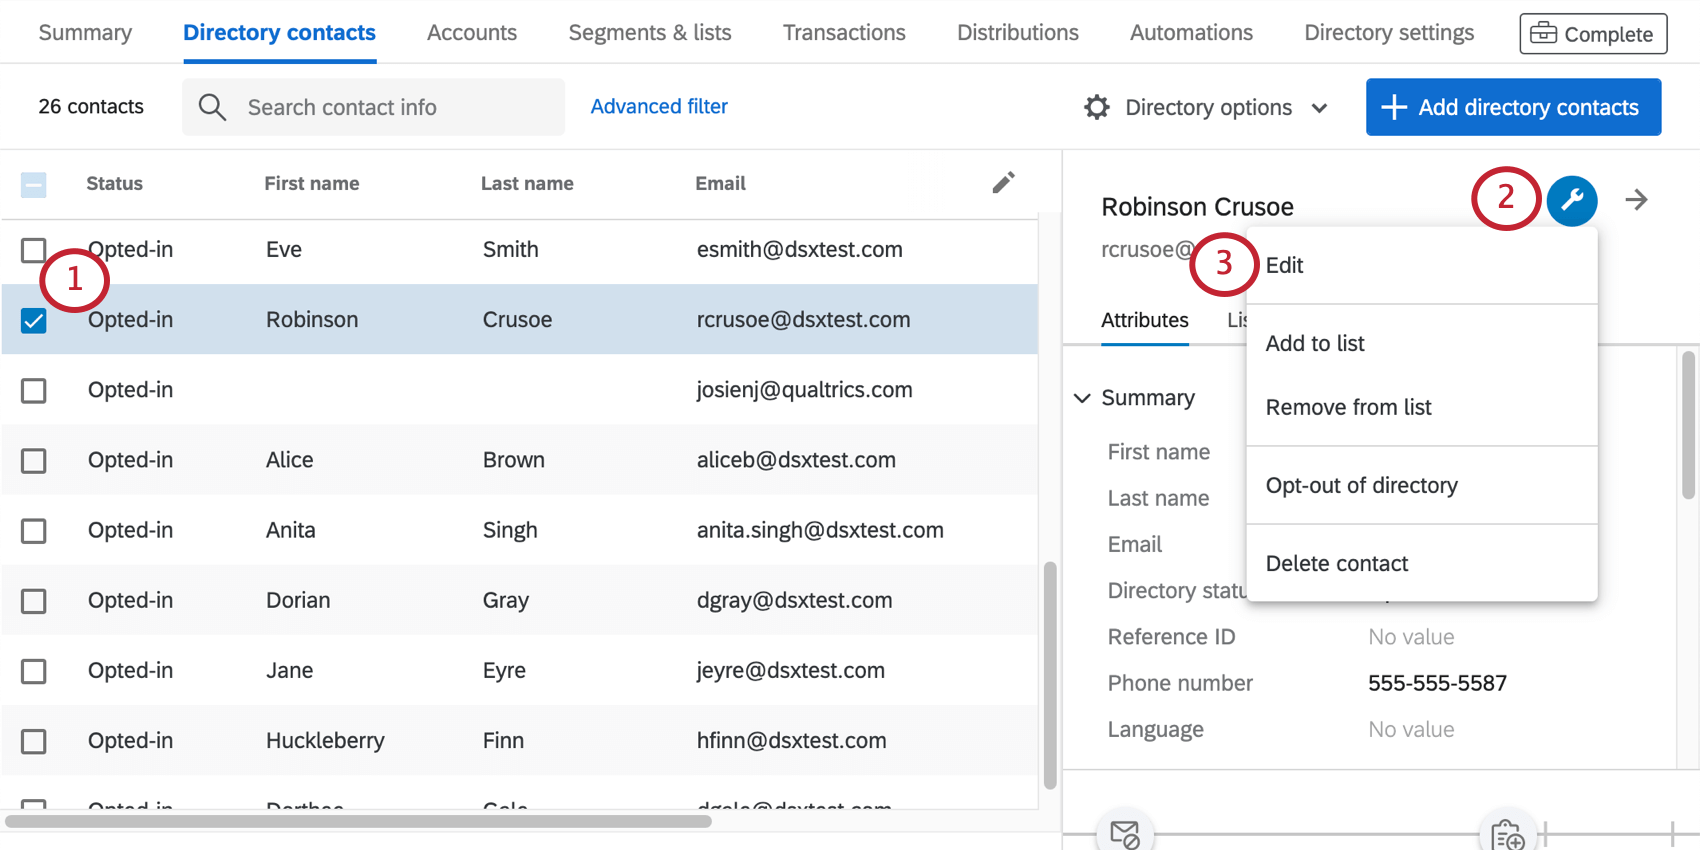
- Click the wrench.
- Select Edit.
- Enter the desired values for the fields shown. You will be able to adjust contact info (including whether the contact is opted into the directory or not), demographics, and embedded data.

- When finished, click Confirm.
Adding Embedded Data to a Contact
Sometimes, instead of just editing a value, you’ll want to add a whole new embedded data field to the contact. Doing so is quick and easy.
- Select the contact.
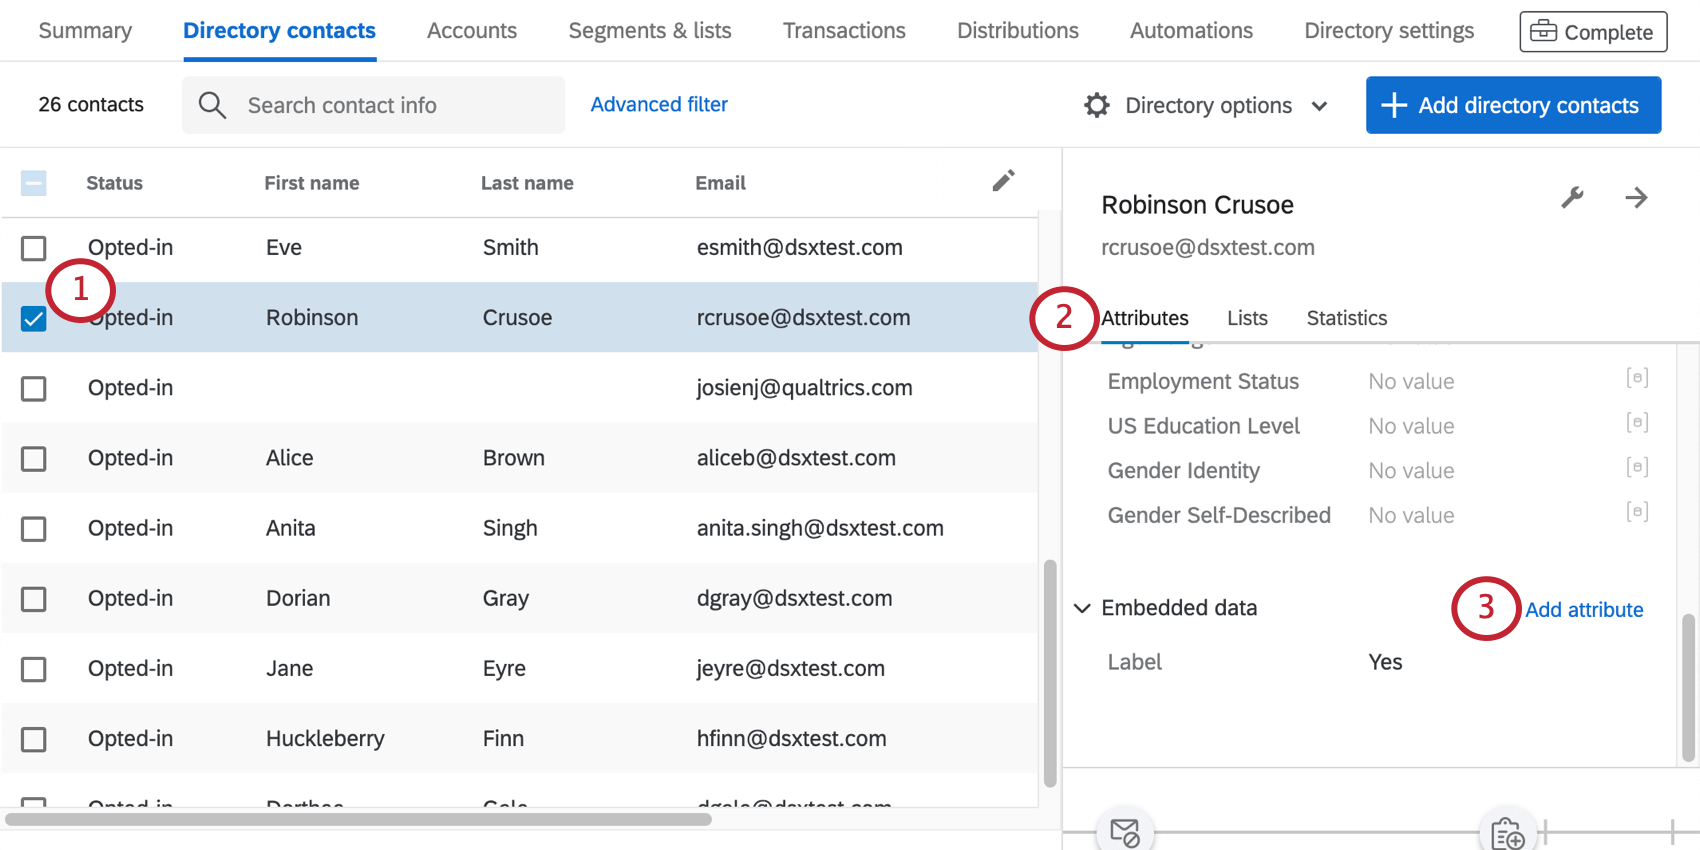
- Navigate to Attributes.
- Click Add attribute.
- Type a name for the embedded data.
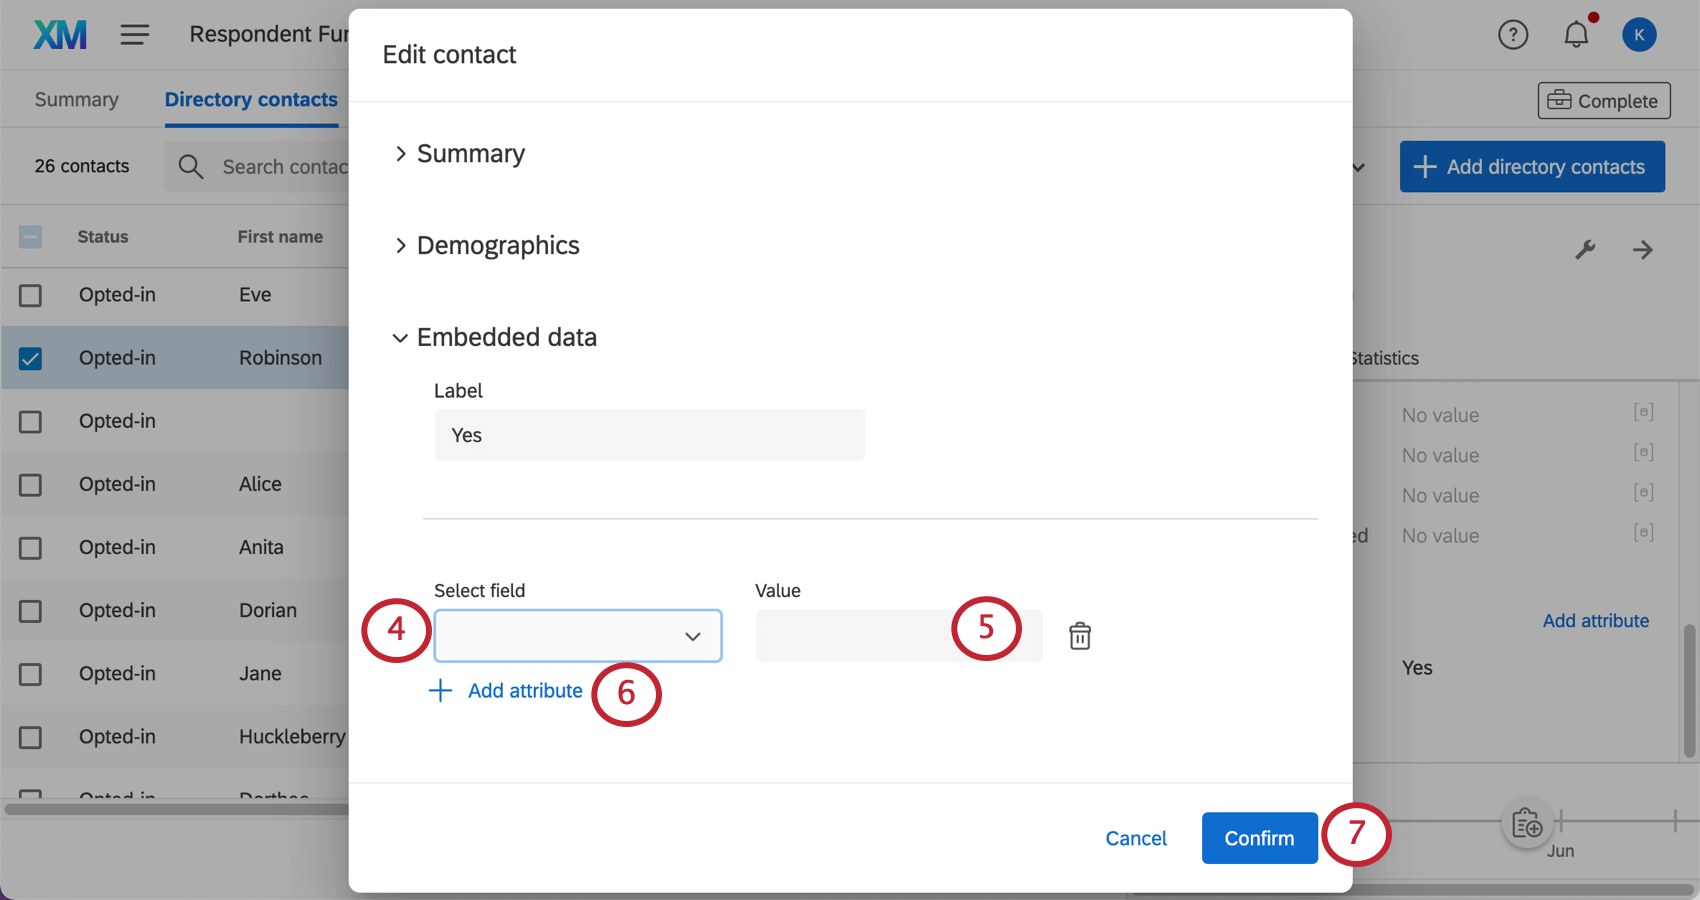
- Type a value.
- If you wish to add more fields, click Add attribute and repeat the steps to name and add a value to your new field.
- When finished, click Confirm.
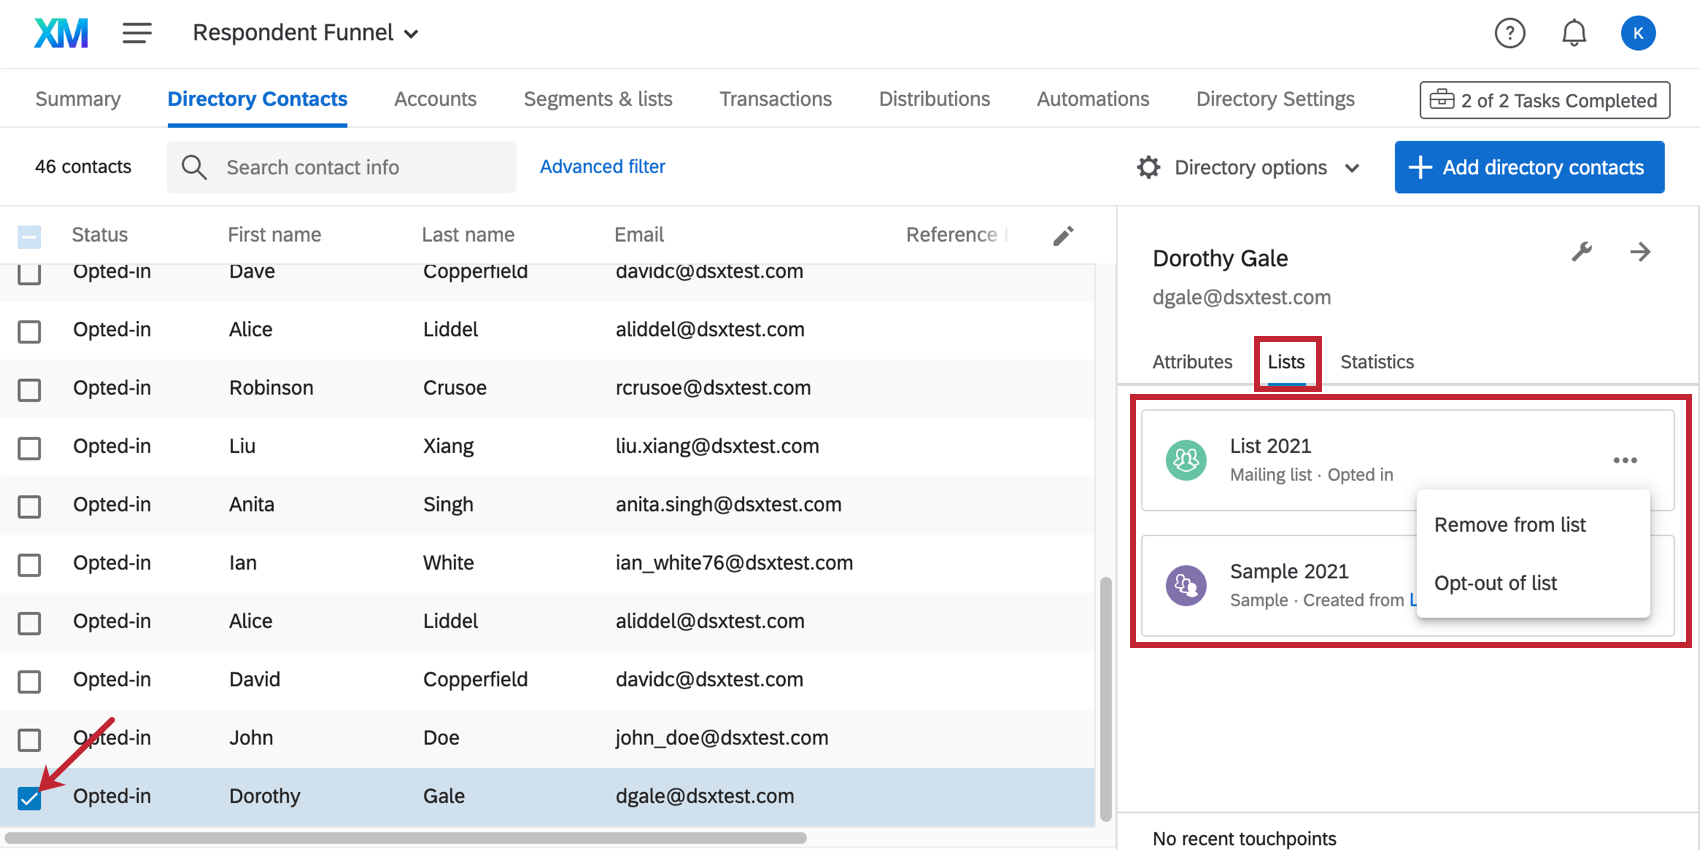
Lists a Contact Belongs To
The Lists section has every mailing list, sample, and segment the contact belongs to. This section will display whether the contact was opted out of lists and segments, and gives you the option of changing this. You can also choose to just remove the contact from the mailing list.
Contact Statistics
The Statistics section contains information on the number of times the contact has been sent invites, and when.

- Last Invite Received: The date of the last invitation received.
- Last Response: The date of the last response the individual completed. Surveys started but not completed do not count here.
- Total Invites: How many invites the contact has received in total, regardless of list or distribution.
- Total Responses: How many responses the contact has given in total, regardless of survey.
- Response Rate: The percentage of the time that this contact responds to surveys they are invited to. Incomplete responses are not counted.
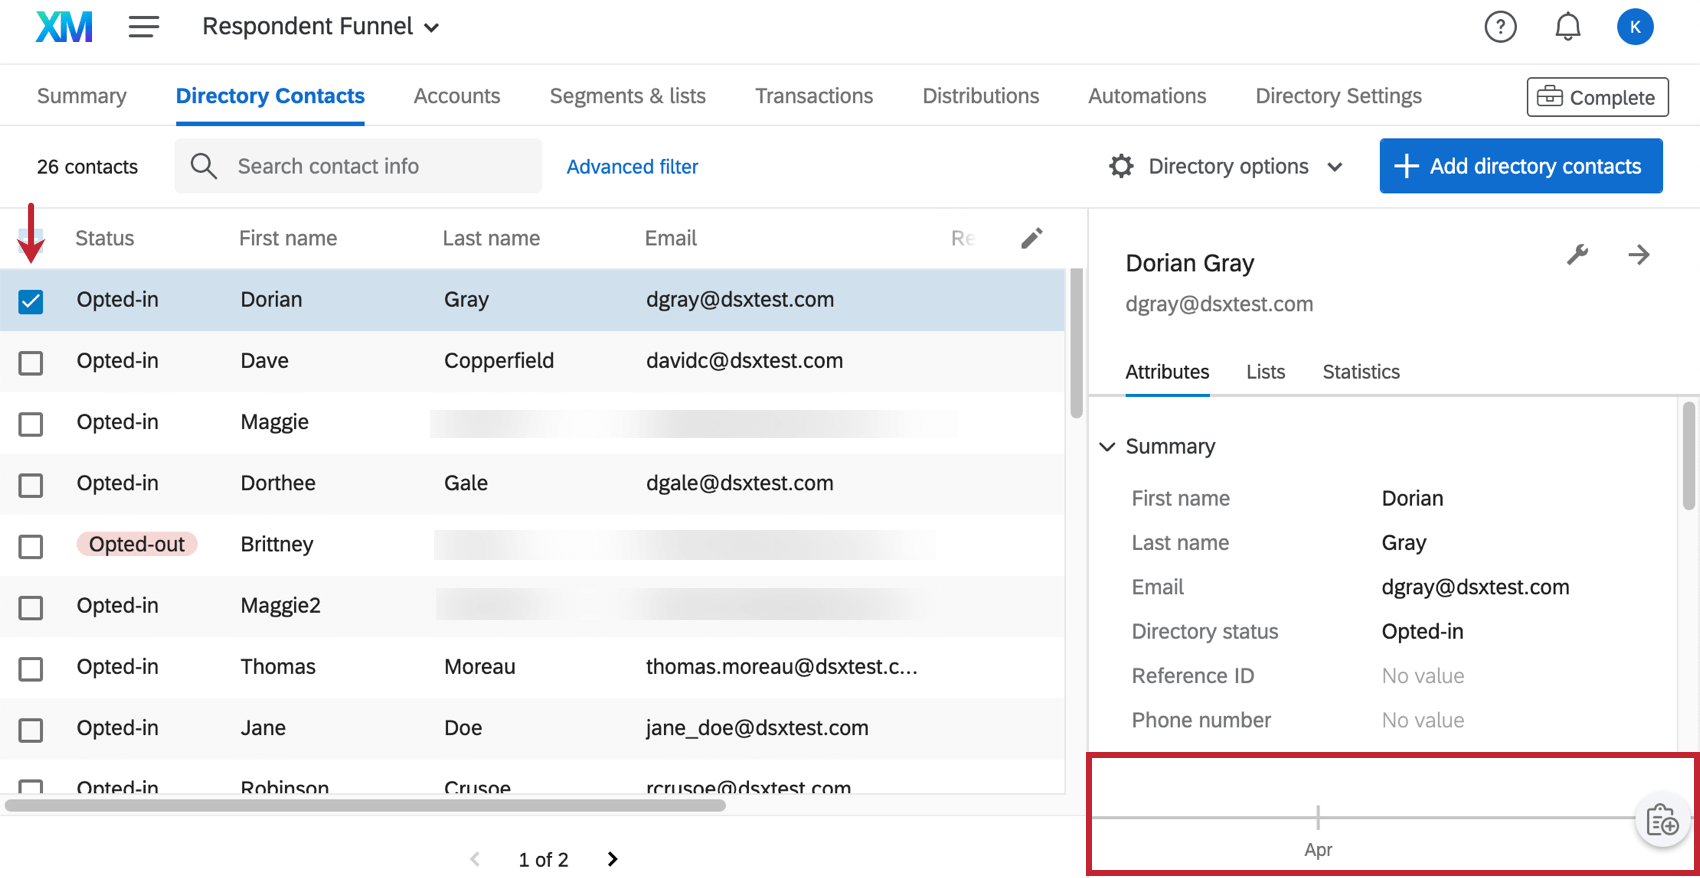
Touchpoint Timeline
When you click on a directory contact, you will be able to access a timeline of all the touchpoints with the contact. This is a great way to get a broad visual view of all the times you’ve contacted someone, and all the feedback they’ve provided.
The timeline is only viewable when you select one contact at a time; selecting multiple contacts will hide this feature.
Accessing the Timeline
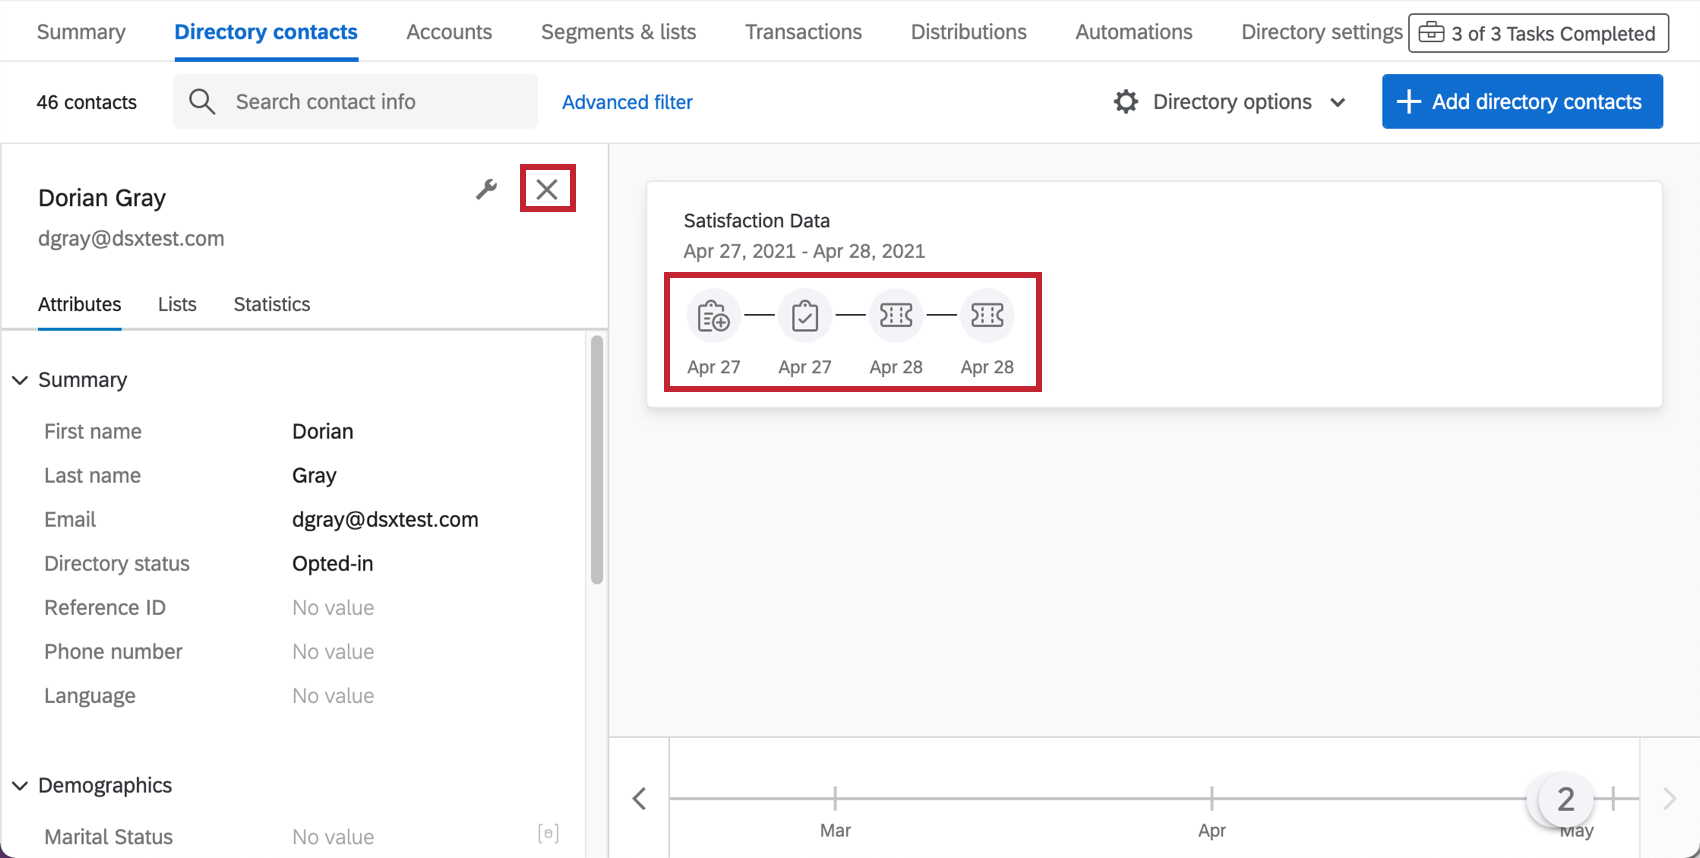
Once you select the desired contact, the timeline will appear on the bottom-right, no matter what section of the contact information menu you are on.
Click a touchpoint icon to learn what type of touchpoints occurred on that date.
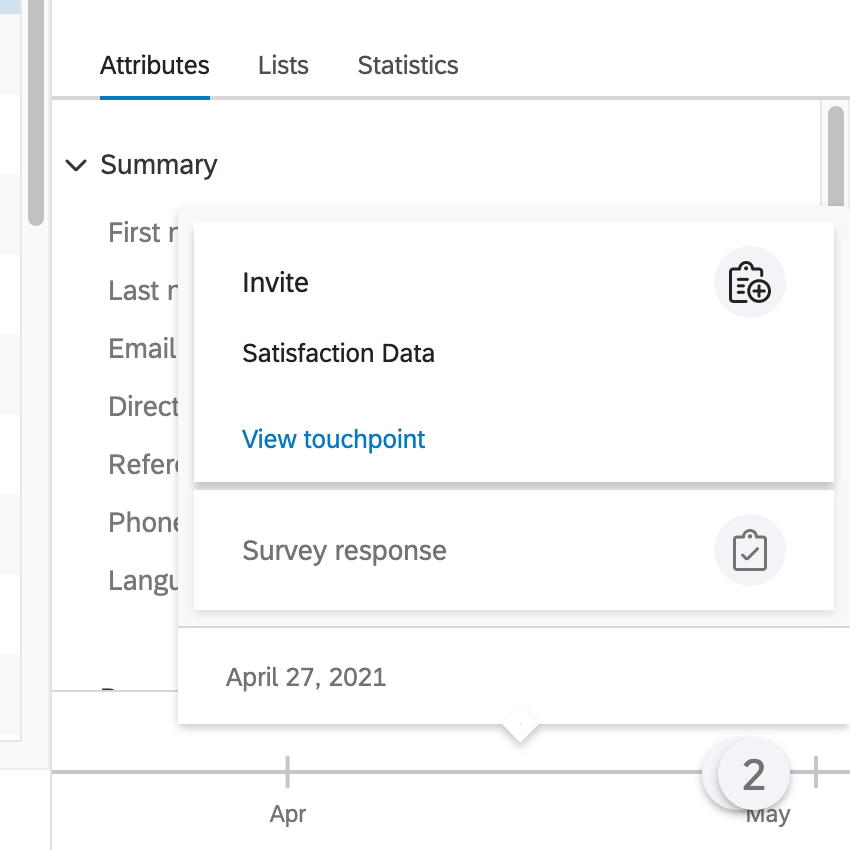
More details can be seen about each touchpoint when you open them up, as explained in the next section.
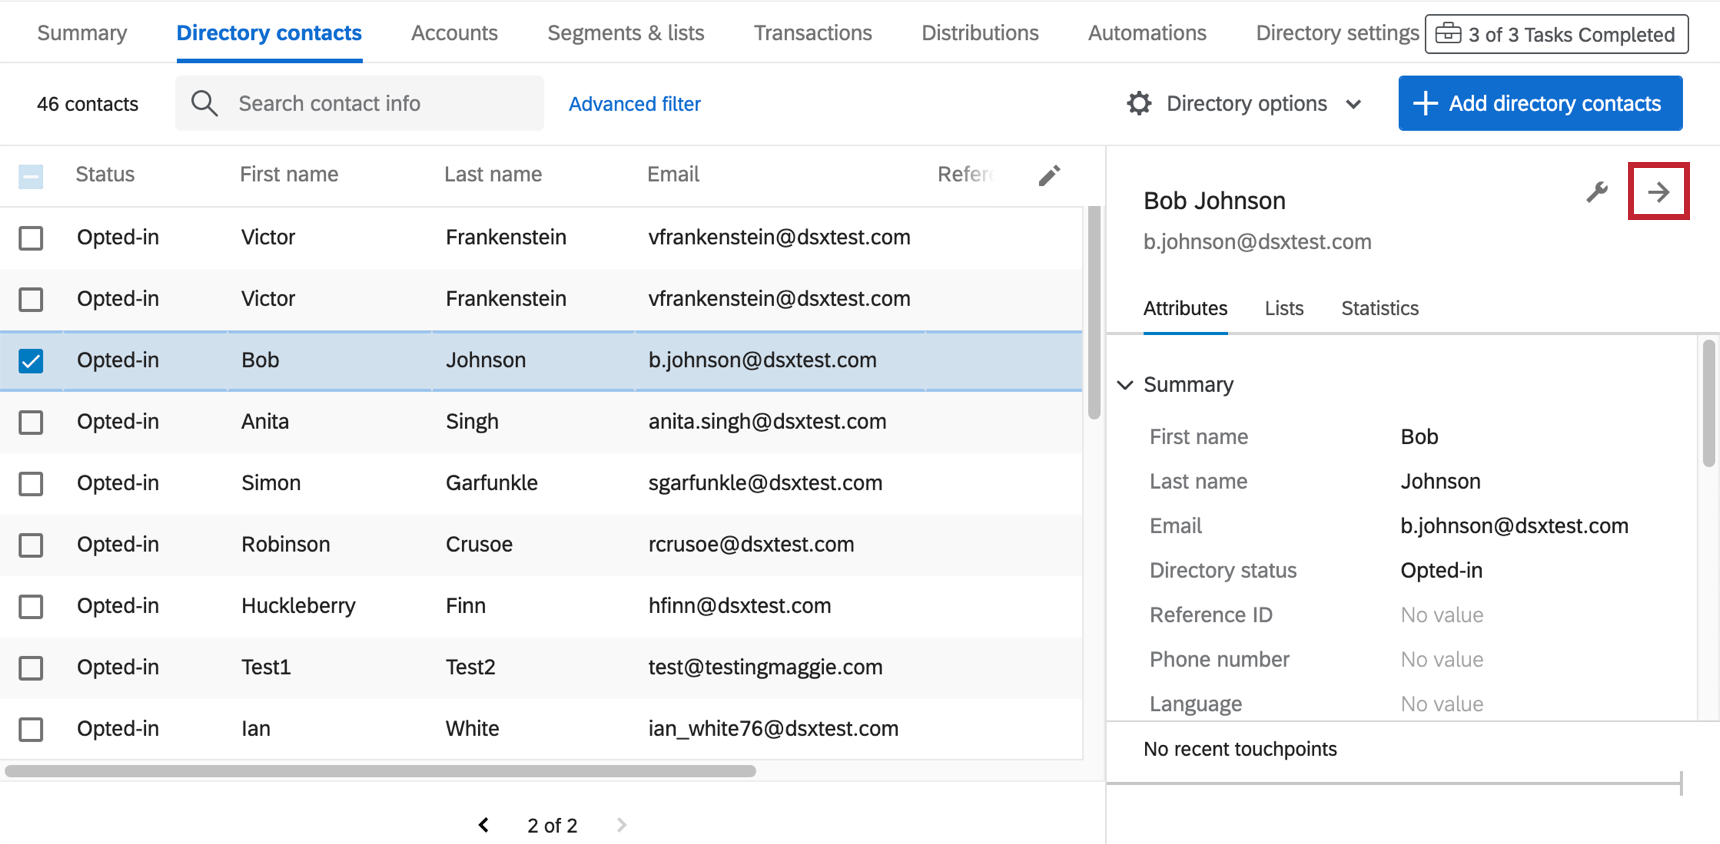
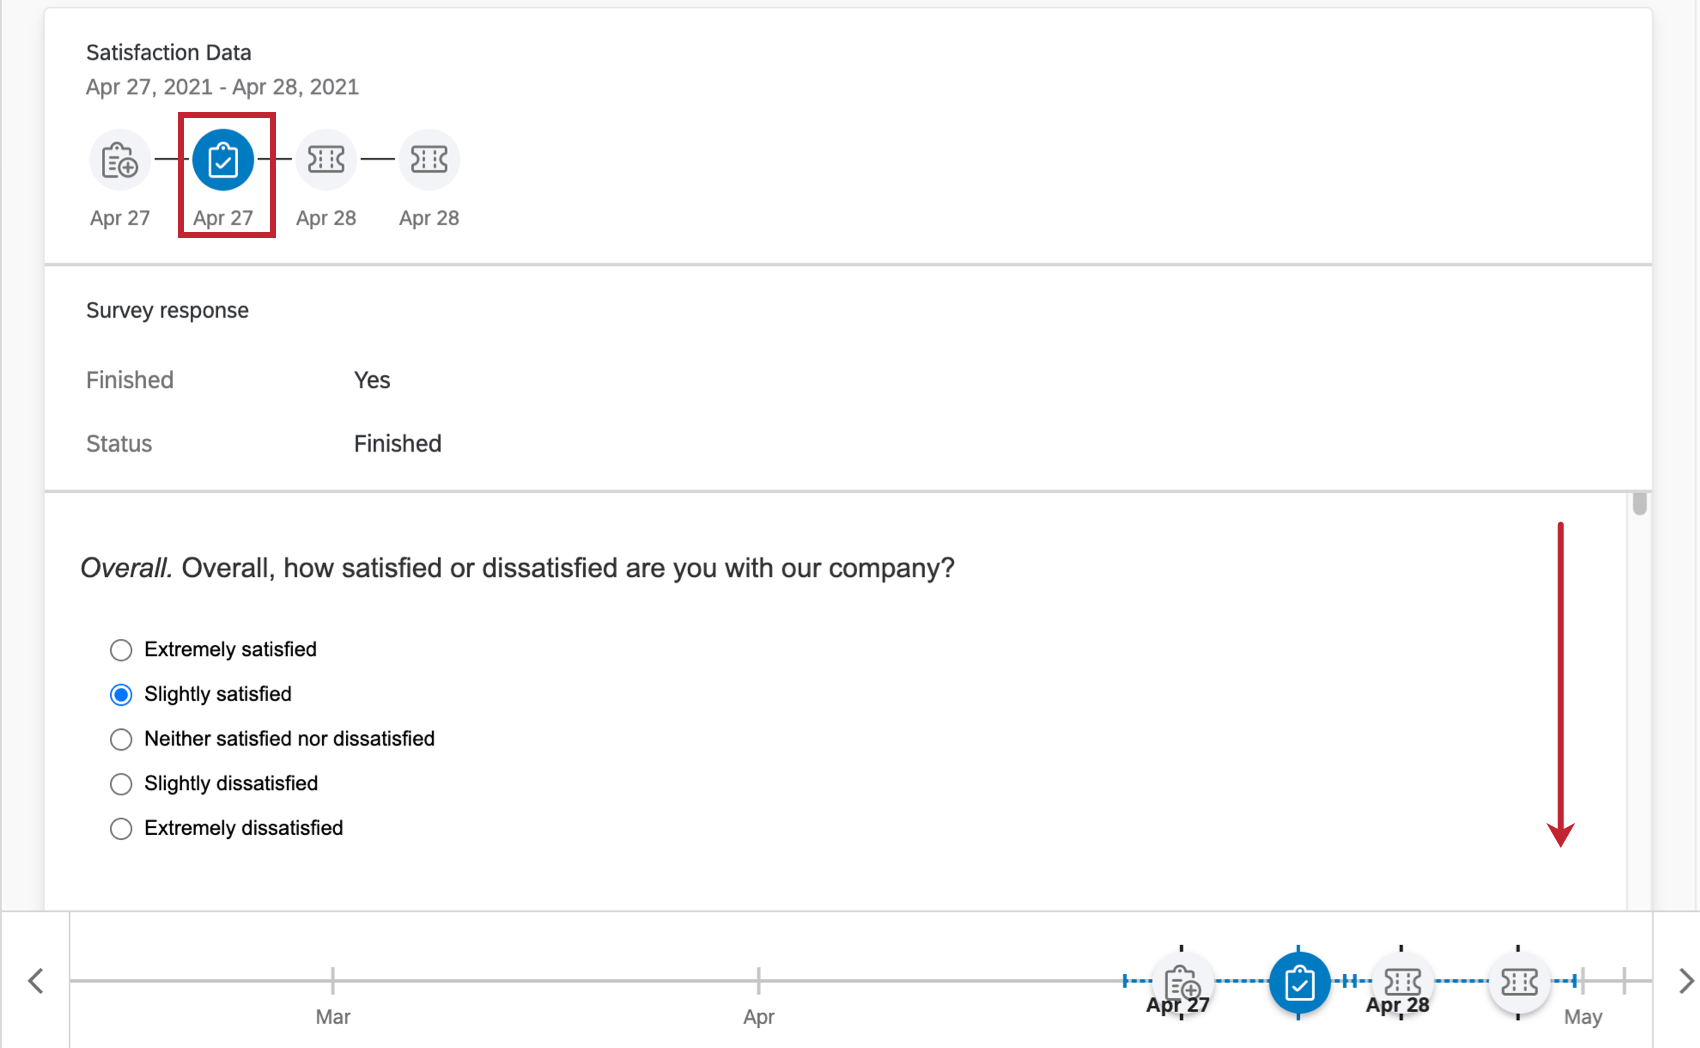
Opening up Touchpoints for Review
Click the arrow on the upper-right of a contact’s information menu to visit their touchpoints in greater detail.
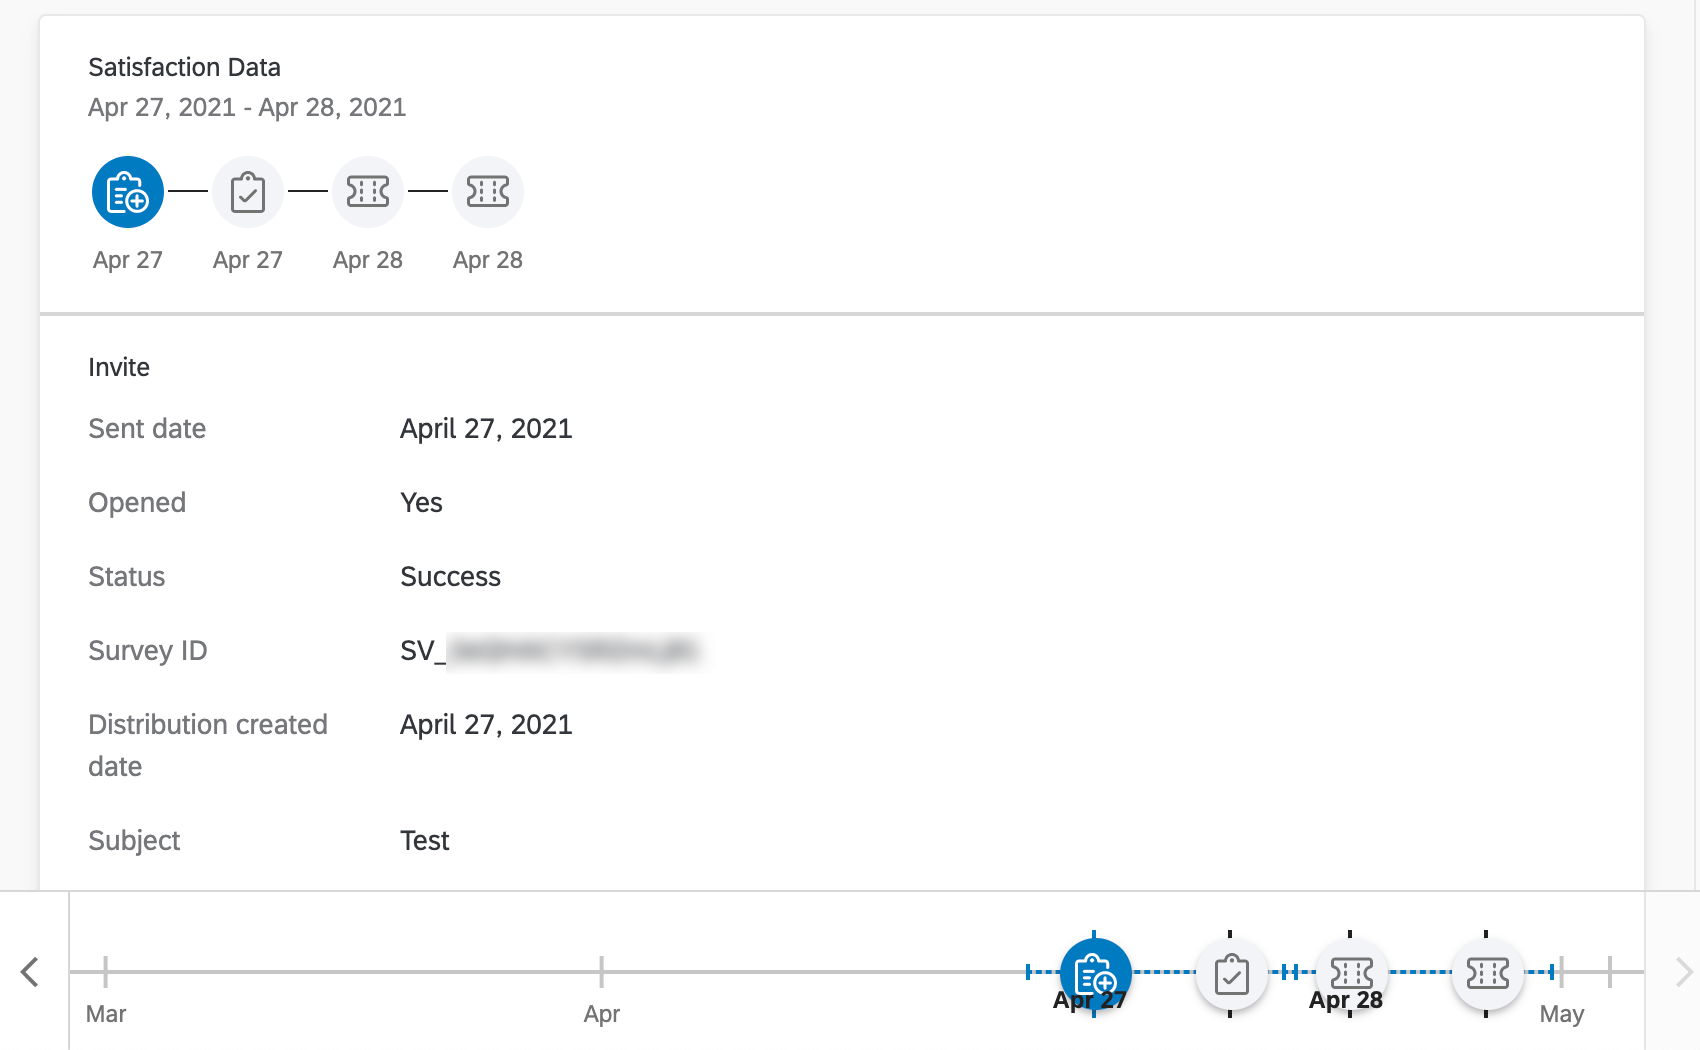
Click the icons to learn more about a touchpoint.
A survey invitation or a plain email will provide information on the survey sent, whether the email was opened, the date, and more.
A survey response touchpoint will actually show you the contact’s response! Scroll down through the response to read all the answers provided.
Contact Actions
Contact actions can be accessed by clicking the wrench next to a contact’s name in the menu.

These actions include:
Adding & Removing the Contact from a List
Adding a Contact to a List
- Select the contact(s) you wish to add.
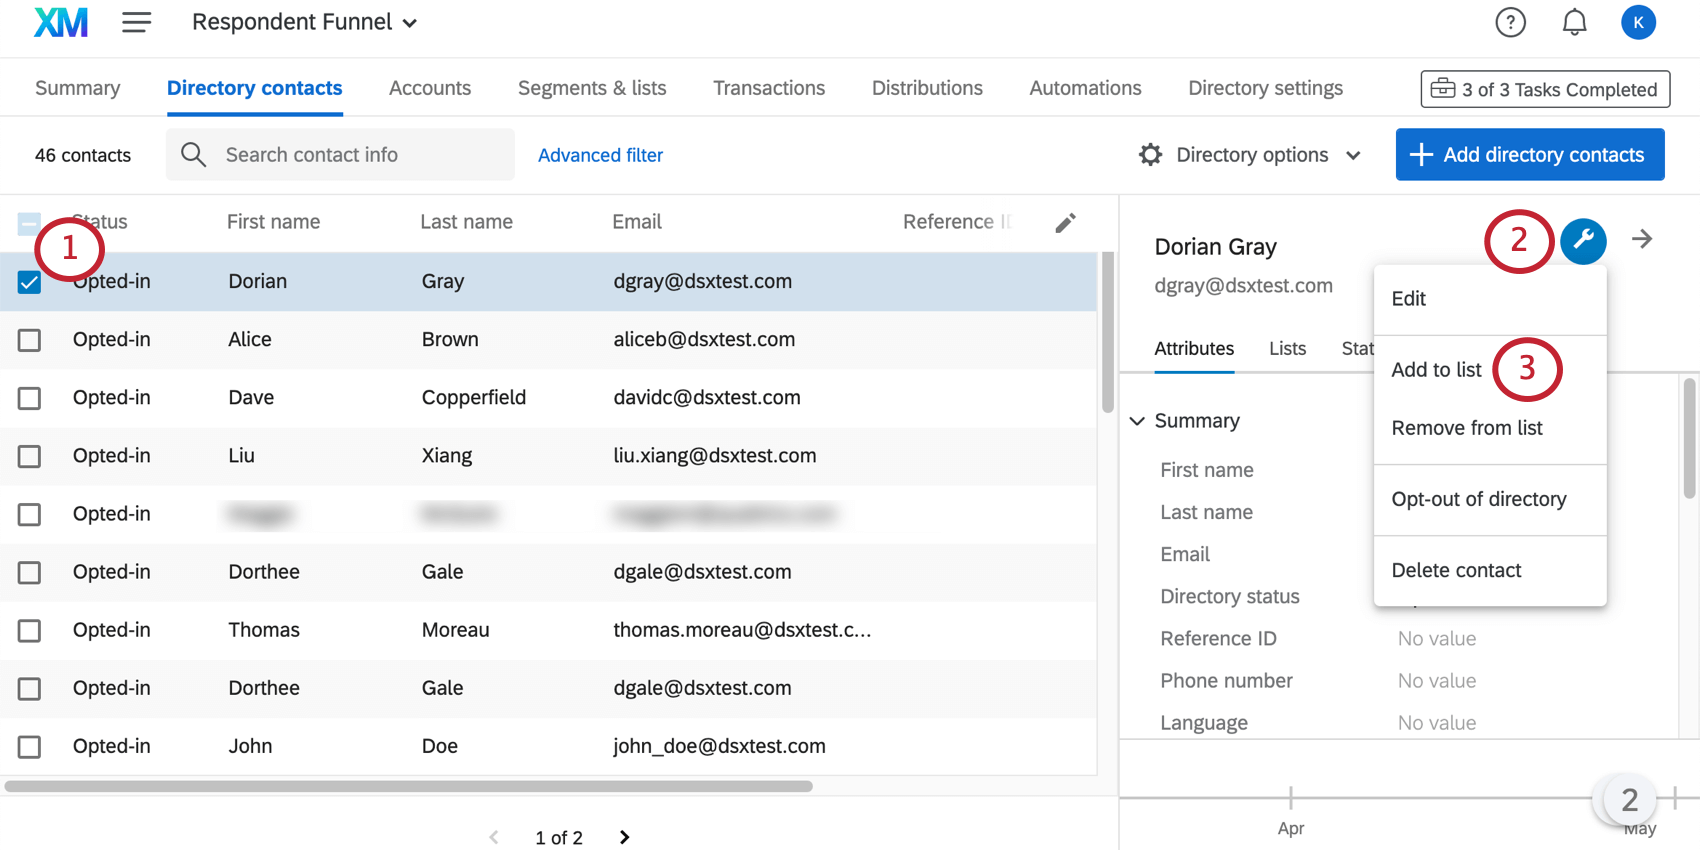
- Click the options icon.
- Select Add to List.
- Select the list you wish to add them to.
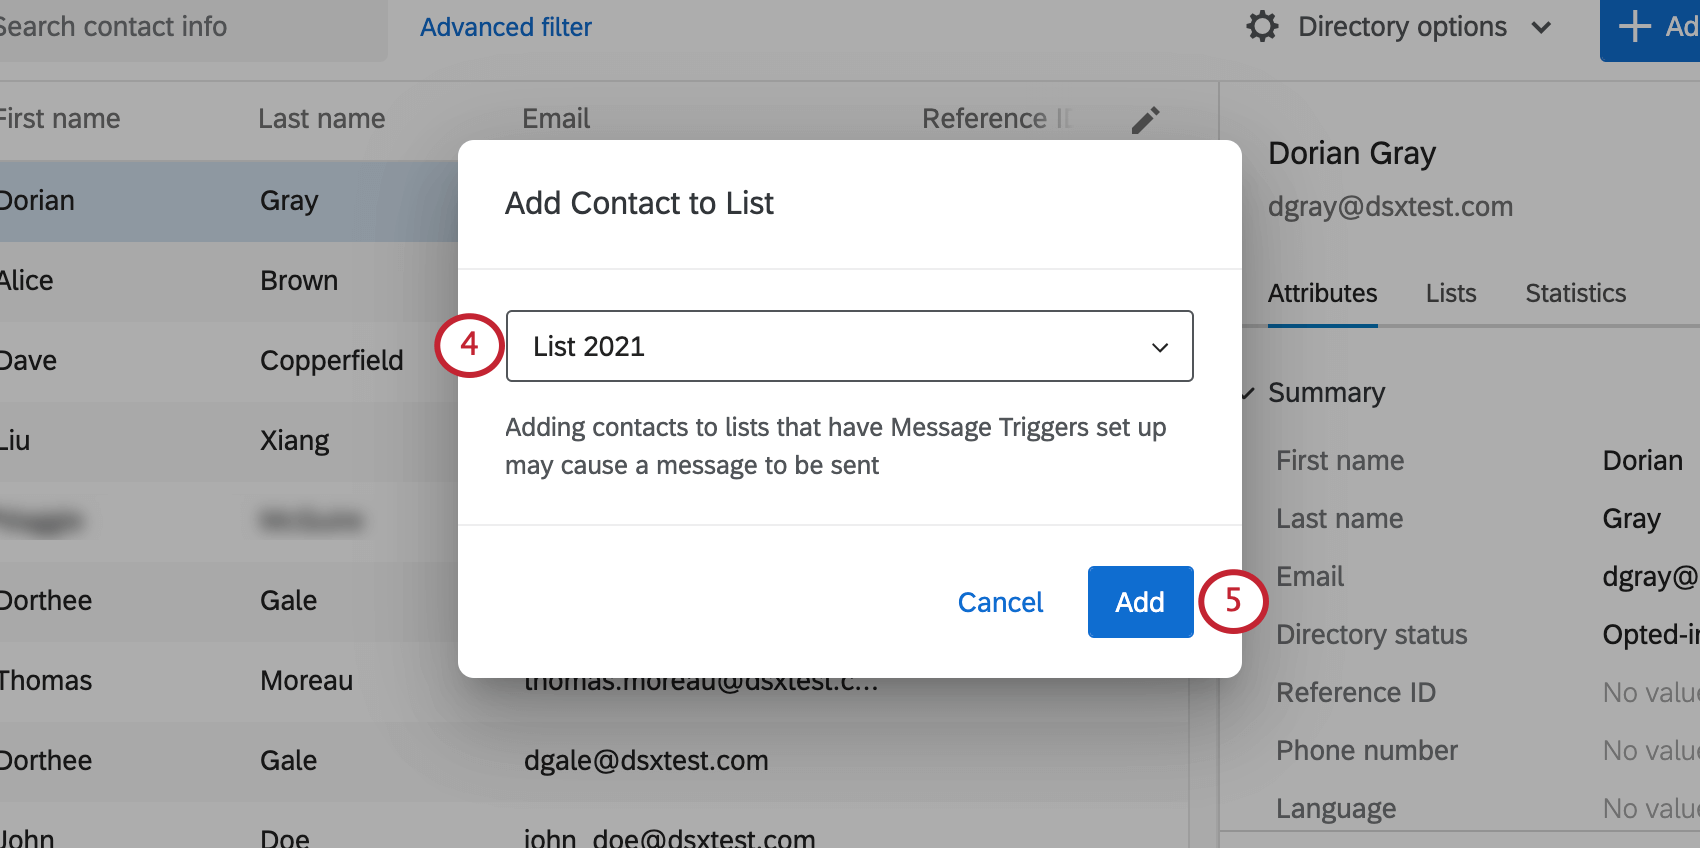
- Click Add.
Removing a Contact from a List
- Select the contact(s) you wish to remove.

- Click the options icon.
- Select Remove from List.
- Select the contact list you wish to remove them from.
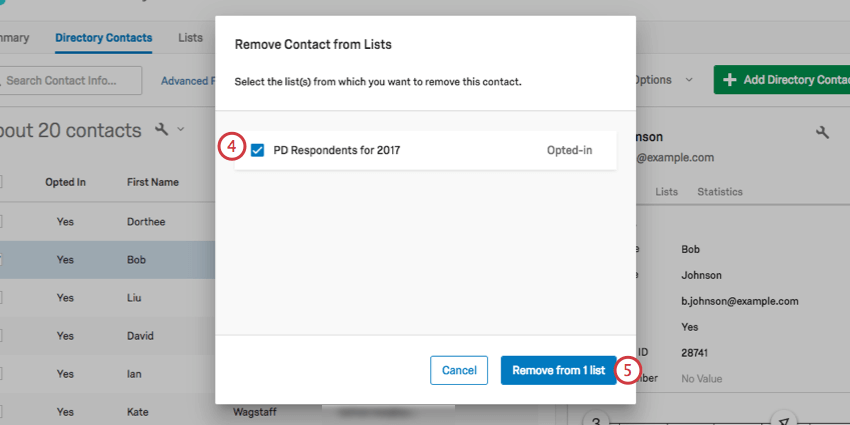
- Click Remove from X list(s).
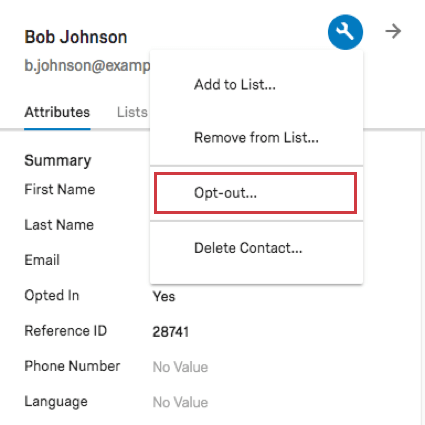
Opt-out & Opt-in
Opting a contact out of the entire directory will prevent them from receiving any mailing from any list they are a part of. They also will not be able to receive emails sent to just them. You can reverse this at any time by opting them back in.
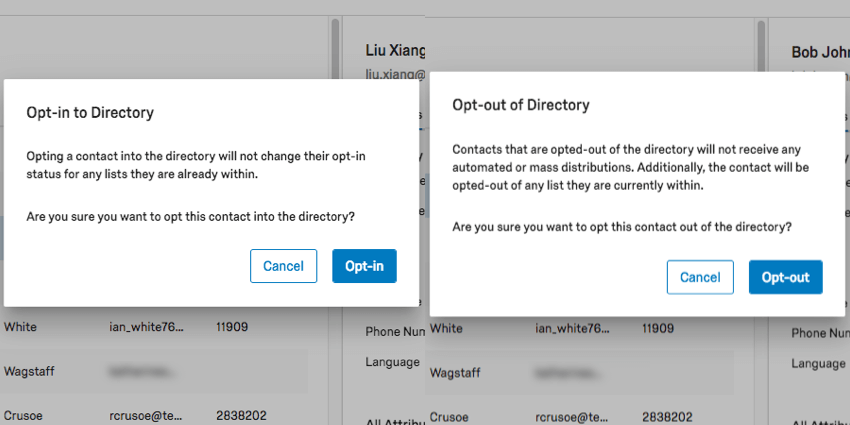
Once you’ve selected the contact(s) you wish to opt out or opt in, click the dropdown and select either Opt-out or Opt-in.
A warning window will ask if you’re sure.
Contacts can be opted-out on multiple different levels. See Opt Out Behavior to see how these levels interact with each other.
Opt-out Behavior
In Qualtrics, you can be opted-out of messages on multiple levels. This section will explain the various opt-out levels, and how contacts can be opted-in and opted-out of these levels at any time.
Directory
The directory contains all contacts for your organization. It is the highest level that a contact can be opted-out of.
When a contact is opted-in at the directory level, they will receive messages from you unless they are opted-out on a more specific level (e.g., the contact is opted-out of a mailing list).
When a contact is opted-out on the directory level, they will not receive any messages from you.
To change the opt-out status of a contact on the directory level, see Managing a Single Directory Contact.
Mailing Lists & Samples
Mailing lists and samples are collections of contacts in your directory. By default, contacts are opted-in to all mailing lists and samples they are added to.
When a contact is opted-in on the mailing list or sample level, they will receive messages sent to that list. However, the contact will not receive any messages if they are opted-out on the directory level.
When a contact is opted-out on the mailing list or sample level, they will no longer receive messages sent to that list. However, the contact could continue to receive other messages, either sent to the entire directory or to another list that the contact is in. Additionally, the contact could be removed from the list and re-added, causing them to be opted-in again.
To change the opt-out status of a contact on a mailing list or sample level, see Managing Contacts in a Mailing List.
Segments
Segments are collections of contacts organized by their attributes.
When a contact is opted-in on the segment level, they will receive messages sent to that segment. However, the contact will not receive any messages if they are opted-out on the directory level.
When a contact is opted-out on the segment level, they will no longer receive messages sent to that segment. Additionally, if a contact is automatically removed from a segment (due to its attribute changing) and then added to the segment again, then the contact will remain opted-out.
To change the opt-out status of a contact in a segment, see Managing Contacts in a Segment.
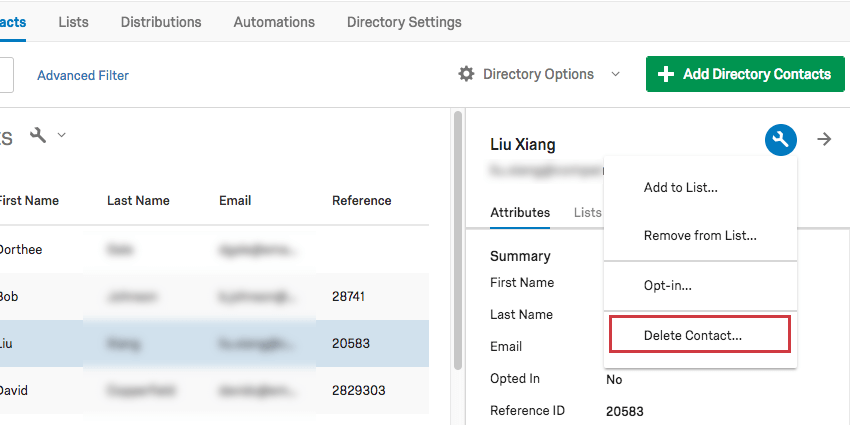
Delete Contact
Deleting a contact from the directory removes them from the directory and all of the mailing lists they are in. Once you delete a contact, it is irretrievable.
Once you’ve selected the contact(s) you wish to delete, click the dropdown and select Delete Contact.